


 Hi there! I’m Tab Kimpton and here’s an archive website of my costume work. I mainly work as a comic artist nowadays so unfortunately I now only make one costume a year for myself, but I try to keep the site updated when I can!
I started cosplay back in October 2007 for a small recon in my local town. Since then I have made dozens of costumes, for myself, friends and commissioners. I do a lot of skit and performance work in my costumes, so you’ll find some funny stuff on this site as well as serious costumes. I love making obscenely complex costumes then taking them up on stage and being ridiculous in them.
I have several years experience giving panels and workshops at events, from sewing skills to laugh out loud Yaoi panels. I try to have a fresh set of panels for each calendar year to keep things exciting. If you’d like to have me do a talk at an event for you, please visit the events section to see my schedule and the sort of panels I give.
I run a dealers table at most Anime/comic events in the UK showcasing my LGBT comic work. If you’re interested in LGBT, Queer, Gender and Sexuality comics, feel free to have a look at my comic work at Discord Comics
If you’d like to see why I don’t have time to make as many costumes any more, check out my house renovations at the Fantabulous House
Cheers! -Tab
I’m currently tailoring a jacket that isn’t going so well, so here’s a tutorial to perk me up about costumes!
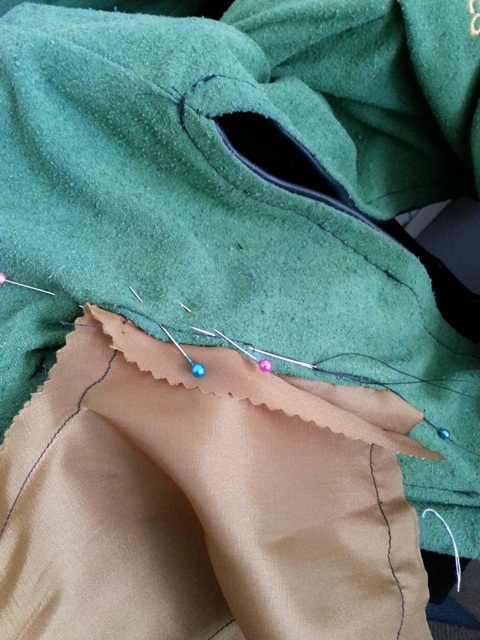
Onward to inserting the lining!
BREAKING NEWS COSPLAYERS.
If you load your bobbin with embroidery thread, and sew from behind you can sew couching on machine in a fraction of the time by hand.
THIS IS MY GREATEST DISCOVERY SINCE FREEZER PAPER.
I found this while (being the exciting person I am) I was watching brother foot attachment videos. You don’t need to buy anything new to do this, just watch this video for more details
I’ve always wanted to do the fancy tailoring thing where you use a pick stitch to roll the lapel and get a smooth curve- well here it is!
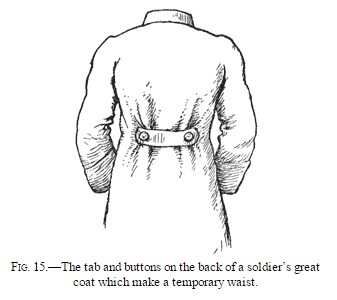
A bit of research later and turns out the back thingy on coats is called a tab- yet another thing to add to my name sake!
Now it’s time to make the pocket lining- an an opportunity to make some huge, decent sized pockets that you can actually fit useful things inside. A pet peeve of mine is fake pockets, or even worse pockets so tiny that you can’t even fit a standard phone inside.
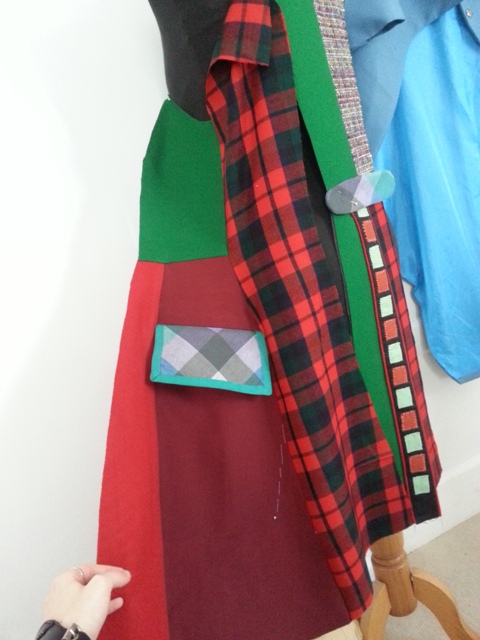
So, time to make those pretty pocket pieces!
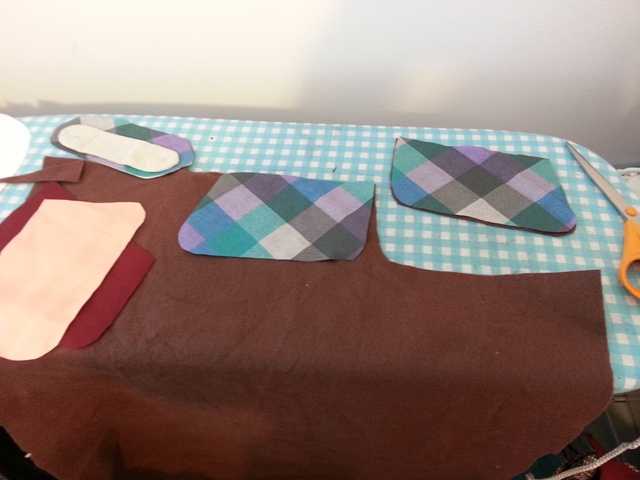
I cut some dark felt out to help line the spoon flower fabric and give it more weight.
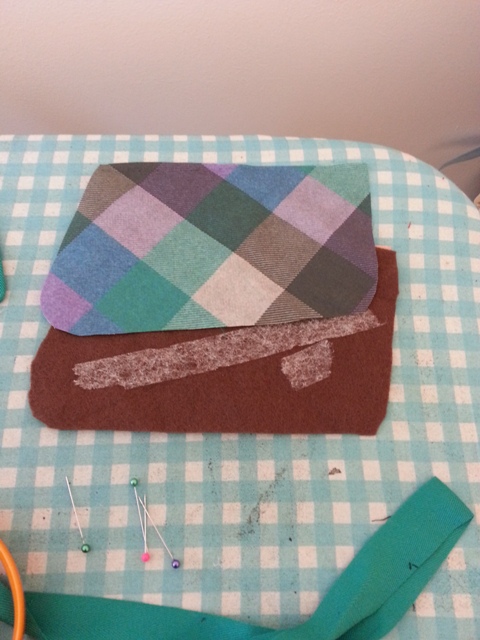
Now the secret of this task- invisible hem tape! I used it to iron the check, felt and lining layers all together in a sandwich of power.

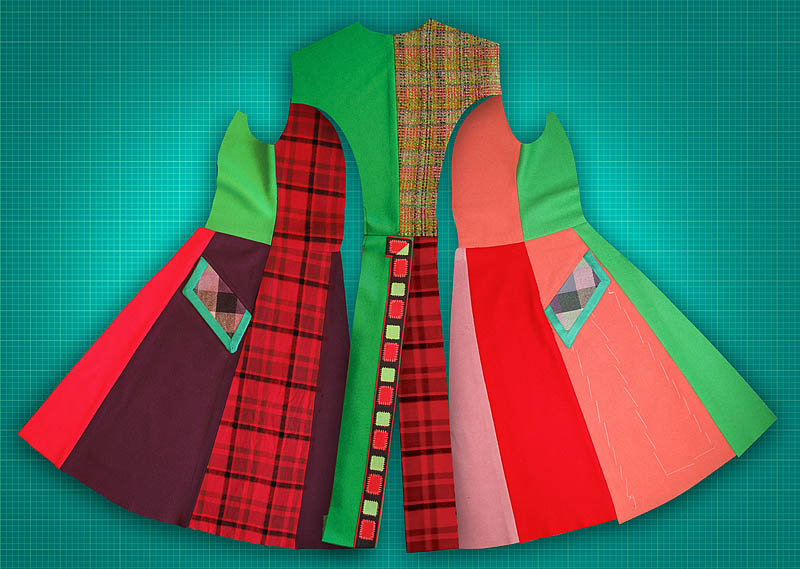
The mock up came back from the customer- we had some issues on the arm placement and the back needed to come in a bit so I made some adjustments then started scribbling! Labelling is super important for this project or you’ll just get lost in a sea of slightly triangular pattern pieces.
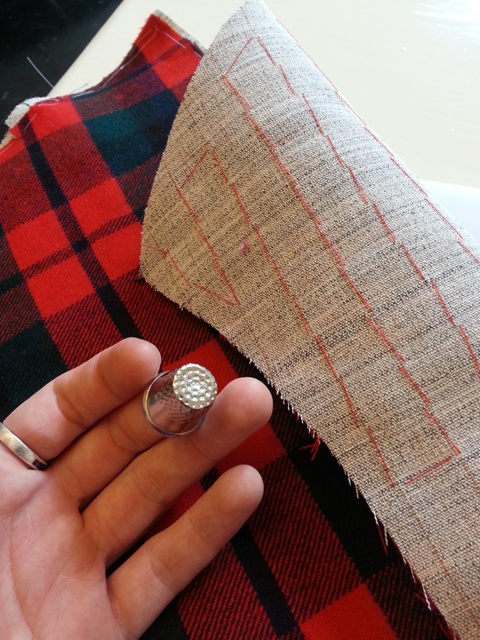
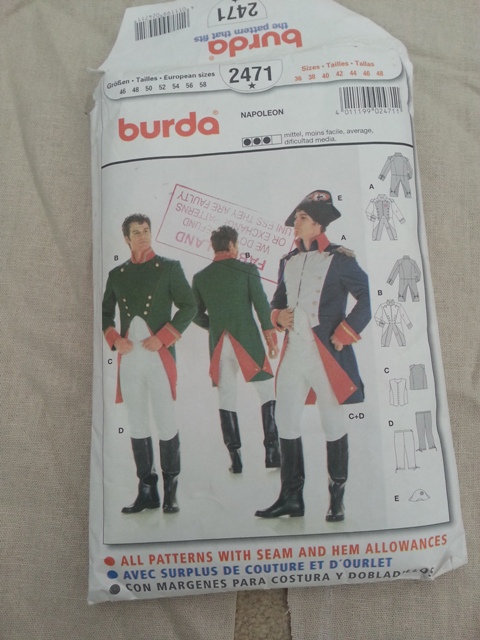
Now onto the pattern! Some of these fabrics are really expensive so I needed to make sure the coat fit properly. This is the epic tale of scaling the pattern up to the commissioners size and constructing it in linen. I chose linen because I’d be using that as the support lining for the flimsier bits of fabric and would give me a good idea of fit and a great surface to write on!
I started with a burda 2471 and massacred it. I bought a bunch of these a few years back for a set of Full Metal Alchemist uniforms I made so I happen to have one cut to most men’s sizes. Here I’m working with a 38″ chest and someone about 5’8″.
I joined the seams up to create a back panel, moving the shoulder seam to a more normal place. To be honest it would have been easier to start from scratch but WHATEVER, let me have my weird ways.
I then split the back panel and removed a slither at the waist. I think it’s important that a man’s coat is tailored to show off his… assets.

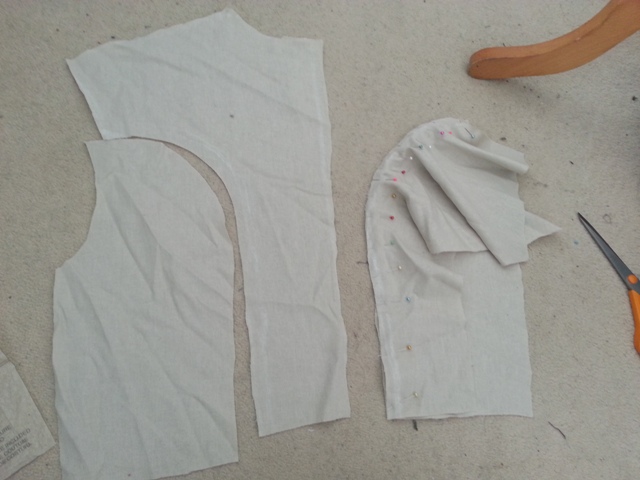
The magical world of pinning a concave curve to a convex one. The key seems to be to have the convex curved piece on the bottom and pin
the concave (one that curves in) on top, using many, many pins to gather it.
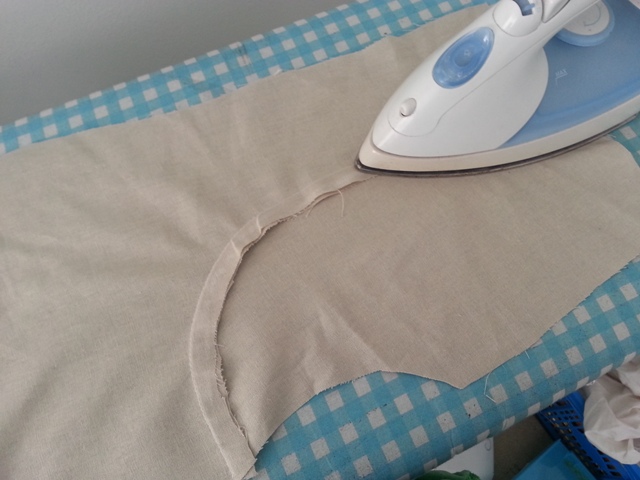
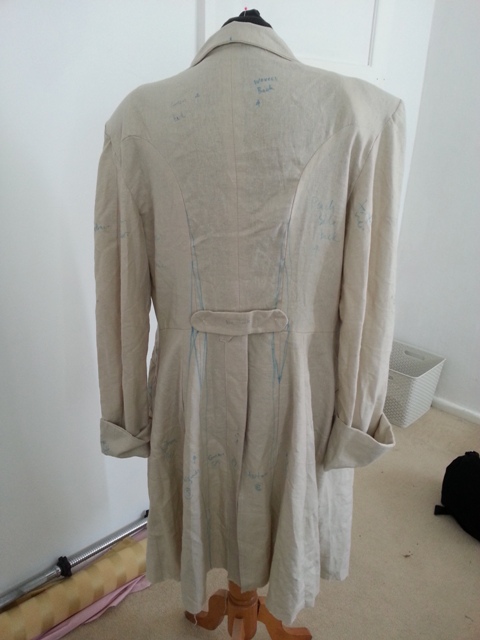
Ironing this is extremely satisfying. You can clip the seam to reduce the bulk but I think that weakens the seam and I didn’t want to risk fraying here.
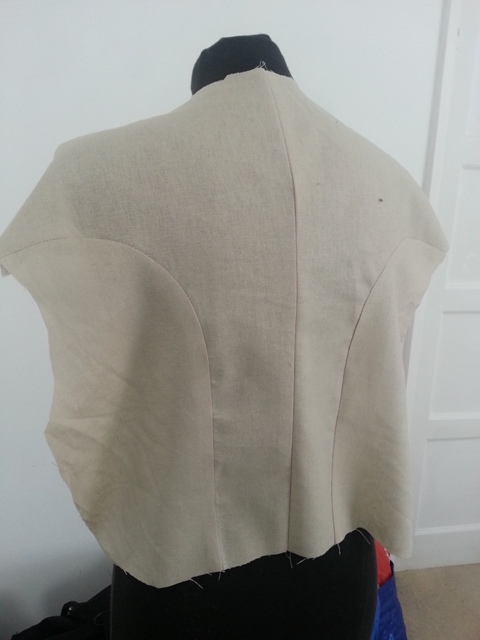
This back is a tailors dream, seriously.
I still make costumes, I promise! Things have been busy what with house viewings and packing, but I’ve still been making things behind the scenes.
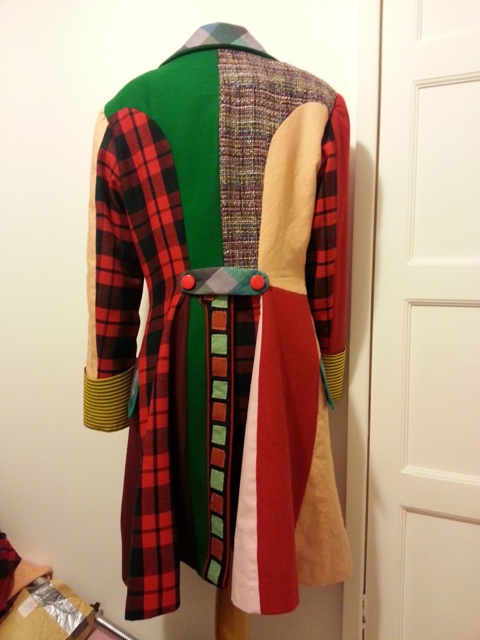
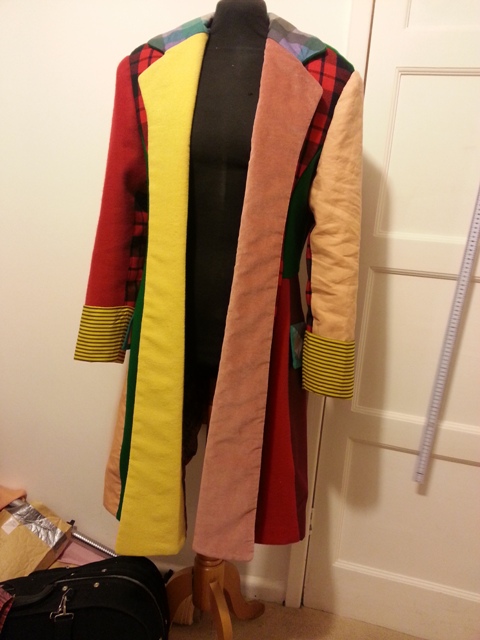
This project is the last commission I took on before closing down ready for moving. But why a Tale of Two Doctors? Well that’s because my dearest chum Christian is a massive Dr Who fan, and has always wanted a 6th Doctor Coat. So while I make a coat for this commissioner, Christian will be making his own coat, using slightly simpler techniques.

Christian and I wearing our Blackadder costumes- Christian’s first ever sewing project!
We’re going to call them the Master and Apprentice coat, with tutorials for both. But first, the most important part of costume making- the research and fabric finding!
Thank you everyone for your interest, but unfortunately I’m closing down my commission service for now as I’m getting ready to move house and won’t have a workshop during the move period. I’ll let you know if I plan to open up again but right now I’m focusing on comic work.
I’ve taking lots of great progress photos during recent sewing work though so you’ll still see tutorials popping up on here occasionally!
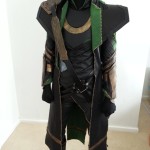
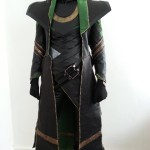
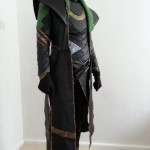
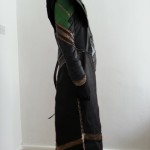
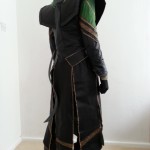
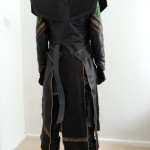
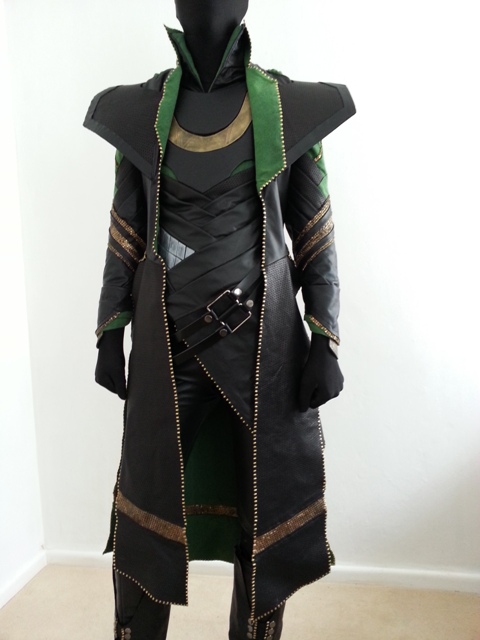
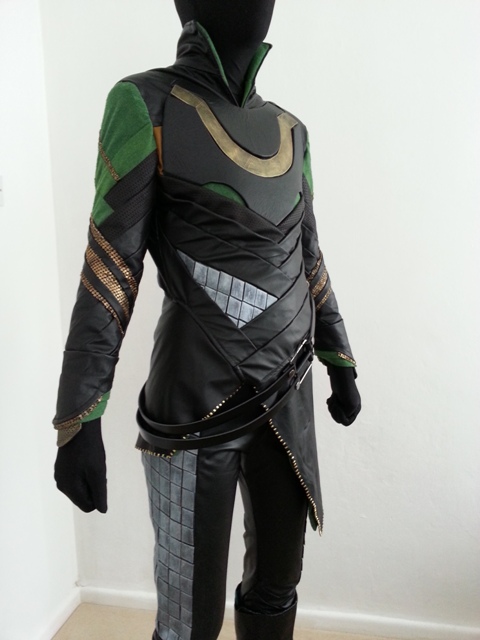
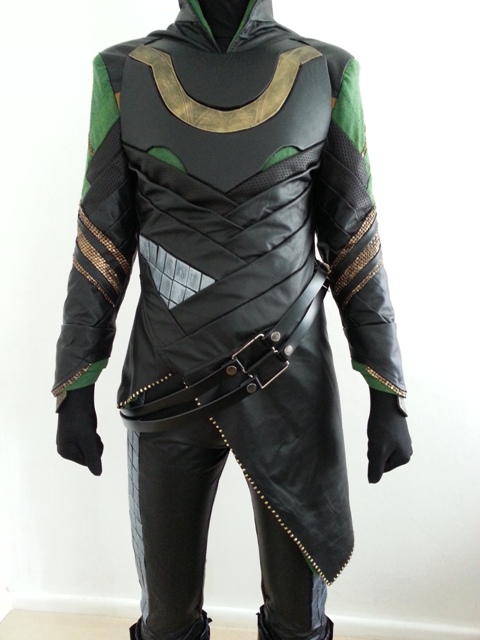
Here’s a round up of all the How to build a Loki tutorials:
Go forth and make!
And now for the final and most important step- adding a damn pocket! This costume has to be worn by a real human person with human needs so a little trademark of mine is to always add at least one pocket that can fit a phone and some money.
This is a hand sewing technique that you can use to add a welted pocket inside any garment- it’s easier if you do it before the coat is constructed, but welp I forgot so here you go.

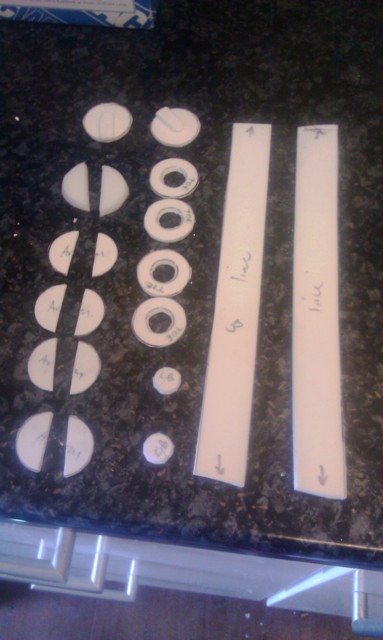
First I grab a rectangle of stiff fabric and back stitch a slim rectangle in the middle. This will become the pocket opening so make sure it’s big enough! When that’s done you cut a slit down the middle and poke the rectangle inwards through the hole, making a slit for you to apply the pocket to.
Sewing in the pocket lining!
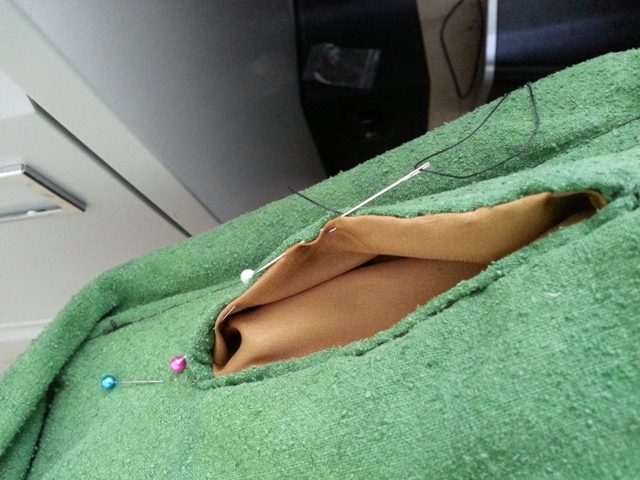
Finishing off the other side. I’m using something called ladder stitch here which is basically an invisible running stitch. I occasionally chuck in a back stitch here and there to keep it secure.

HOT DAMN WHAT A FINE POCKET.
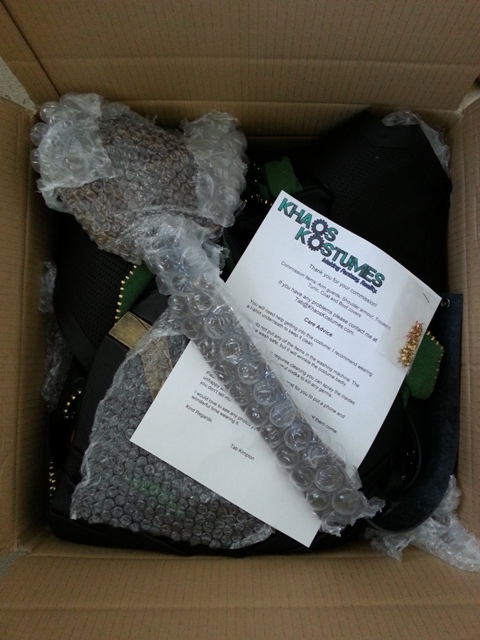
Then the whole lot gets packed up and sent to the lovely person who commissioned me. Now onto the next one!
Had an awesome time in Norway at BANZAICON! (despite missing our flight and having to take an emergency ferry!) Over there I did a panel on how I built the loki costume which reminded me to get finishing on this tutorial!
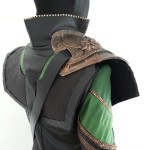
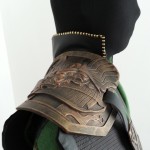
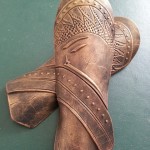
Sometimes the hardest part of making armour is figuring out how to attach it to yourself. Here’s what I did with mine:
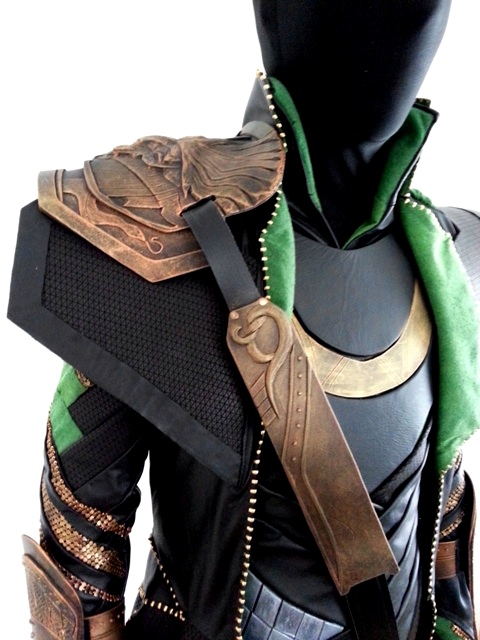
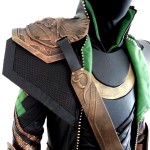
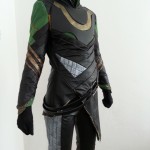
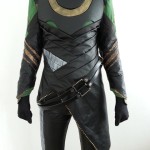
Long post is long- Here’s the breakdown of how I made the tunic for Loki.
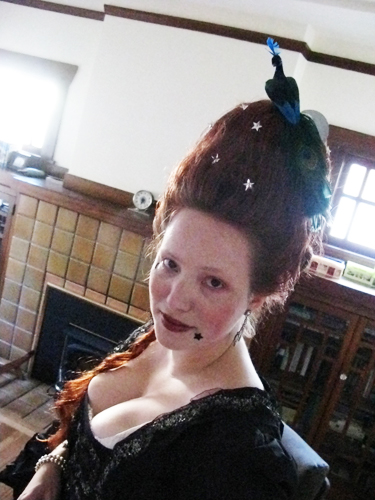
It’s busy busy busy at Haus Khaos as I’m working on costumes for an upcoming production of Pirates of Penzance- in the meantime here’s an amazing tutorial for a georgian wig that I could have used last year:
Phew! I Hope everyone has had a wonderful holidays- I’ve had a couple of requests for continuing the loki tutorials so here we go!
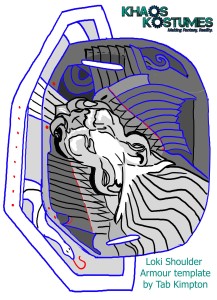
Here’s the template for the shoulder plate if you want to play along- If you do end up using my template then I’d appreciate a link back to me and I’d love to see what you make!
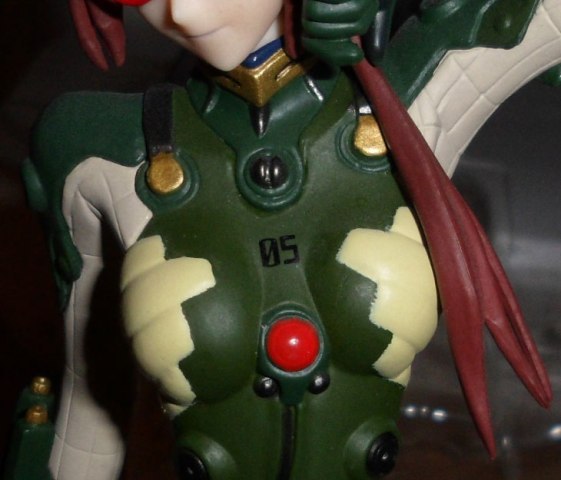
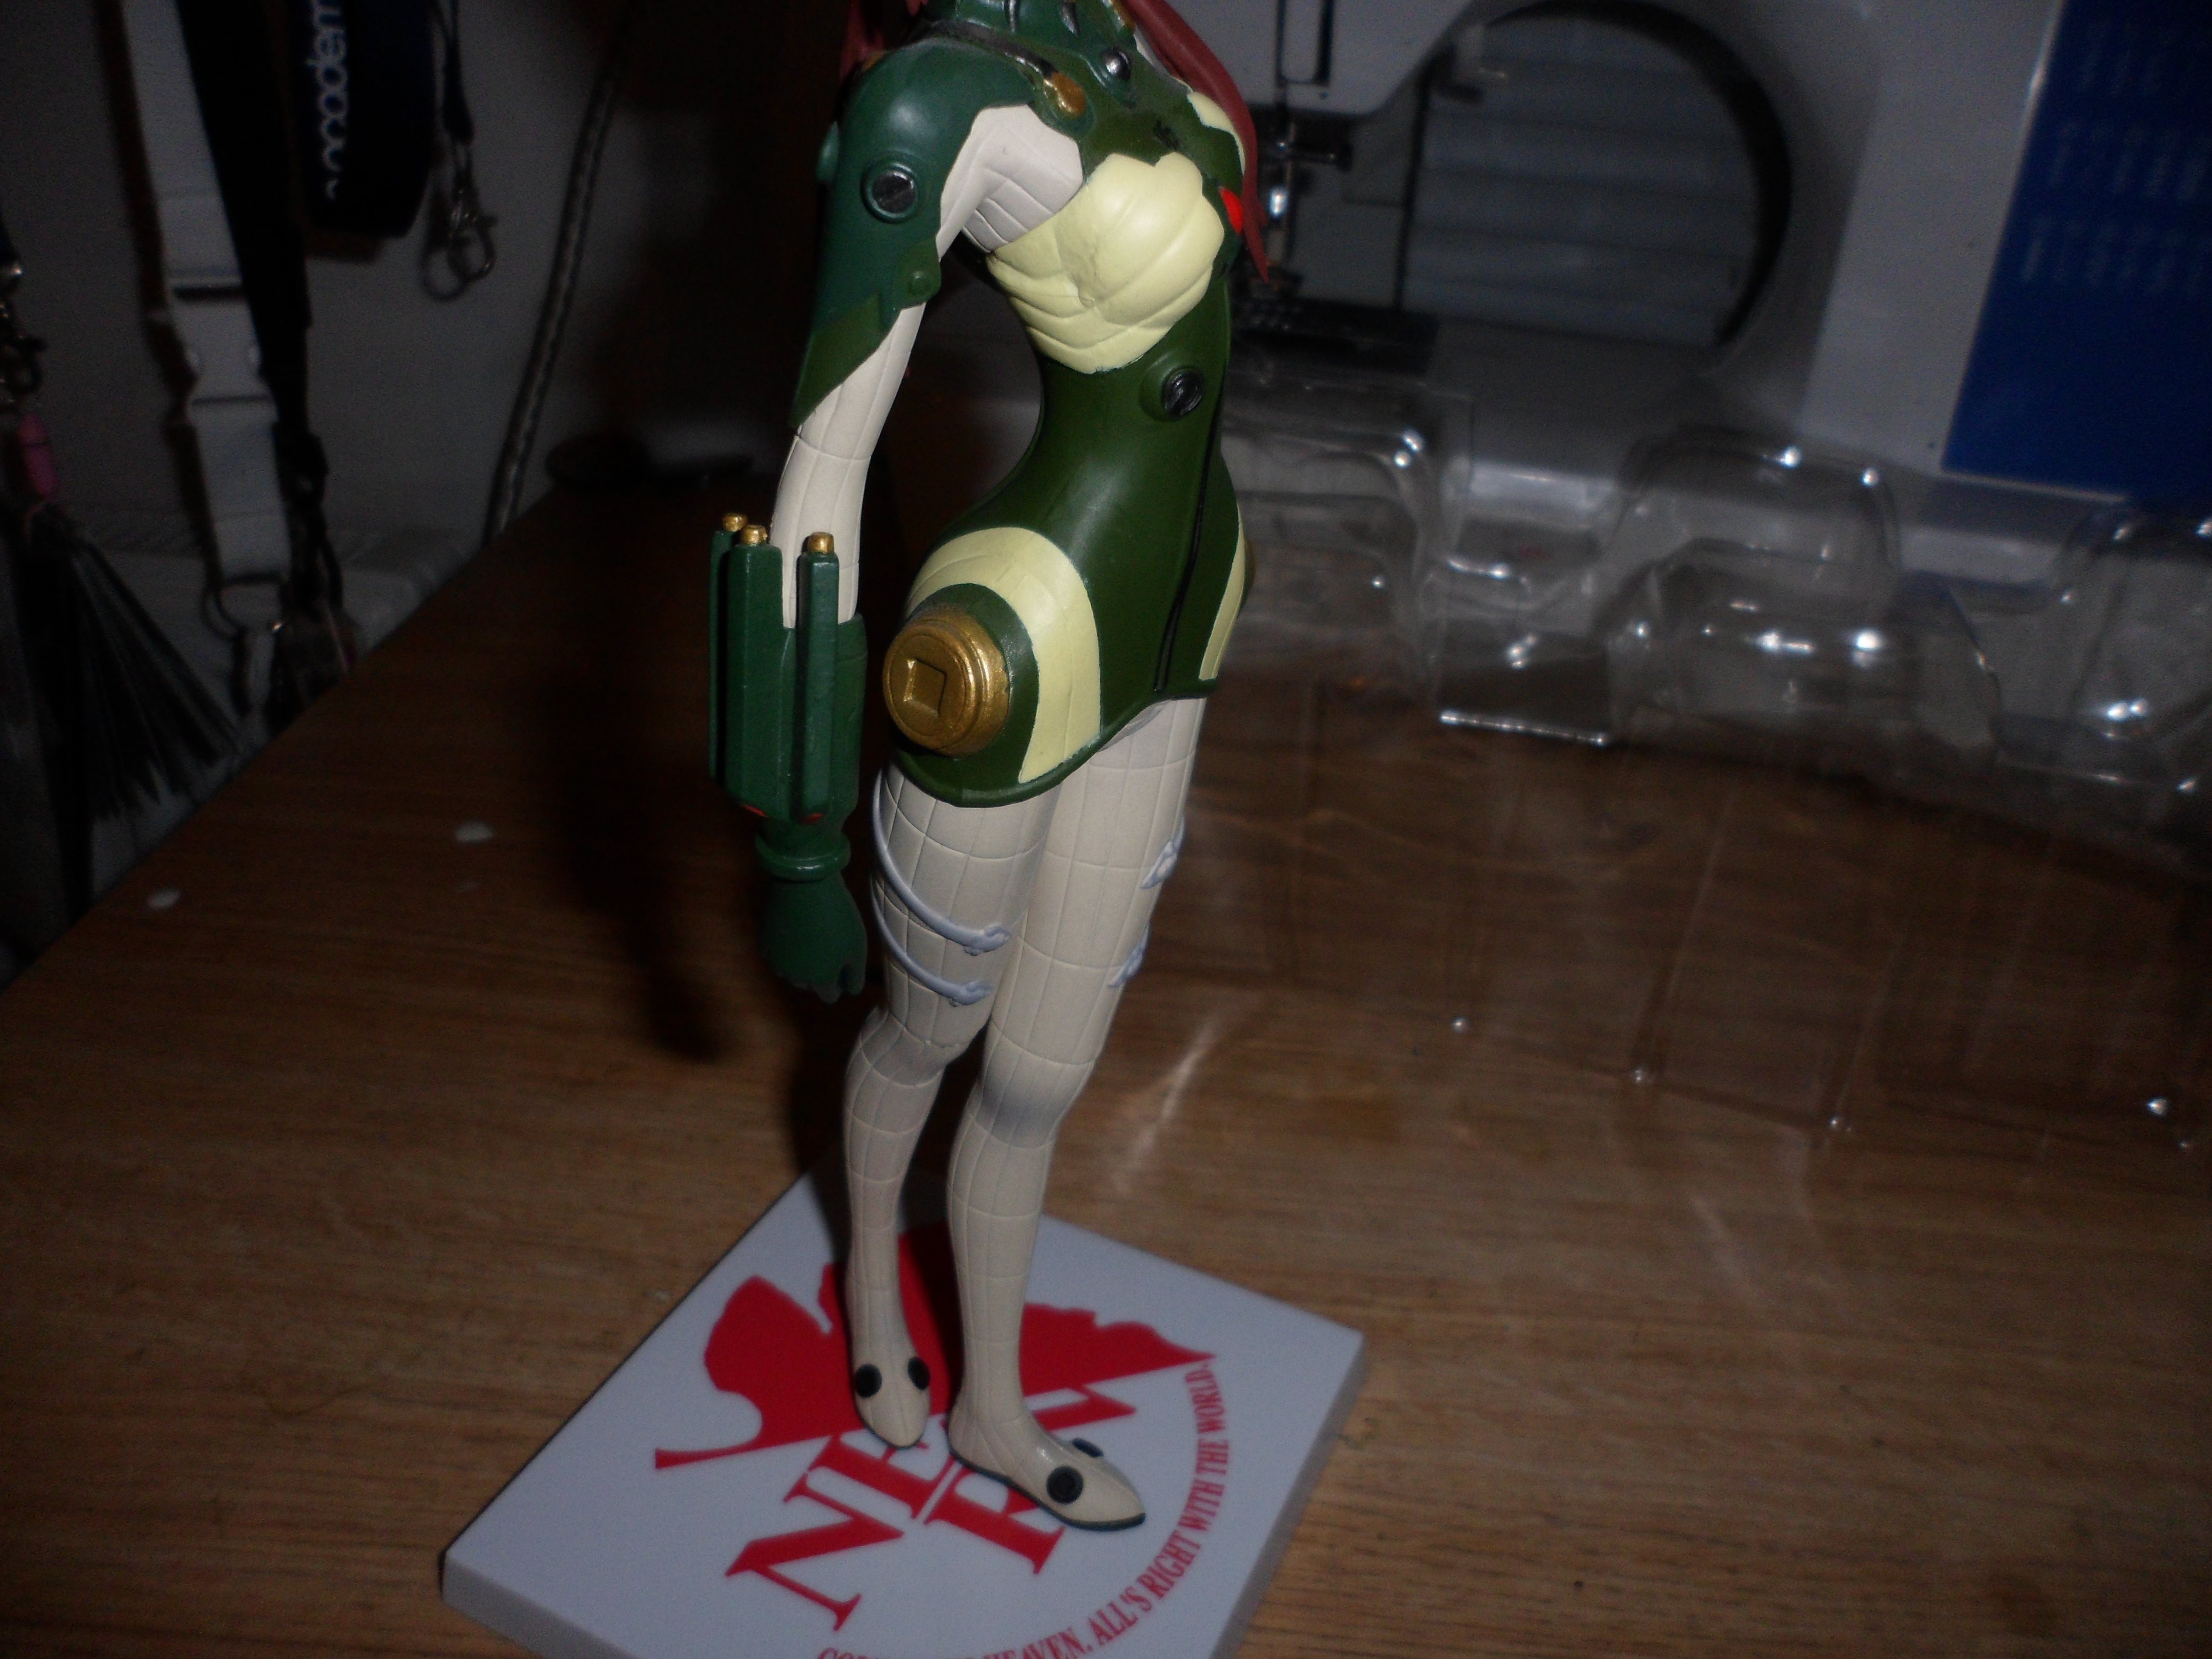
Okay, so as part of the plugsuit I needed a nice glowy orb to go on the chest. You could just do this with a red christmas bauble, but here’s the technique for casting in resin and adding a LED.
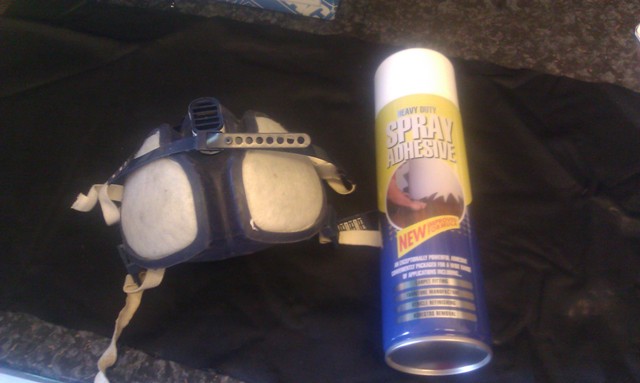
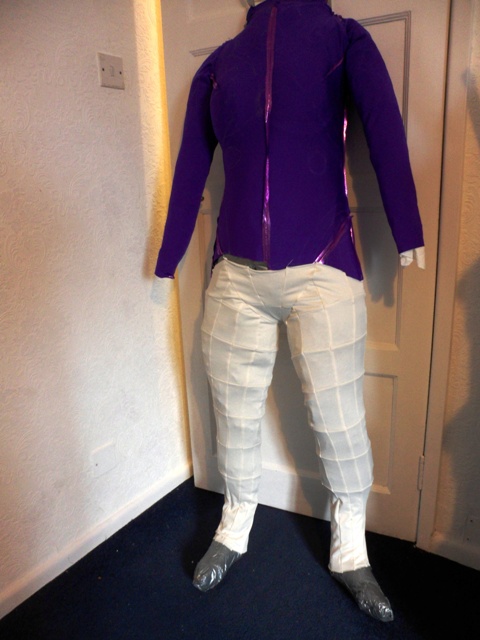
Lyrcra armour is very simple, all you need is lycra, scissors, some glue and a breather so the glue doesn’t kill you.
Poll results are in! Time to make some plug suit : D
Here are the previous tutorials in this series
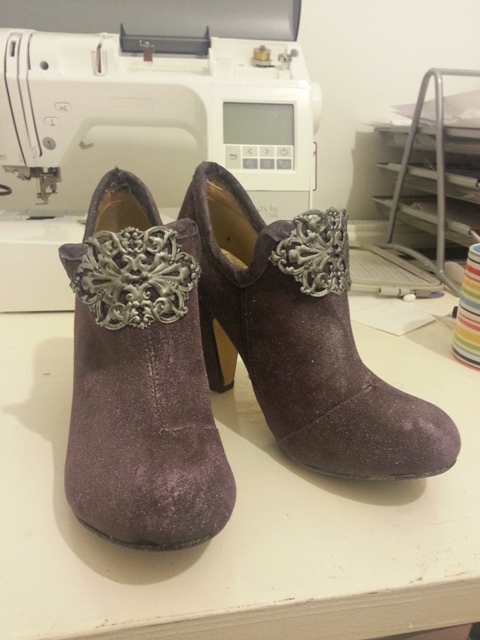
| How to make a plug suit part 3- F**king shoes |
| How to make a Plugsuit Side tutorial- Skin tight gloves |
| How to make a plug suit Part 2- Armour/Plugs |
| How to make a Plug Suit Part 1- Mock Up |
Here’s how I made these beautiful skin tight legs.

And now the most complex part of the costume broken down- the COAT.