Costumes and Performances by Tab Kimpton

Latest

How to make a Loki costume part 3- Materials

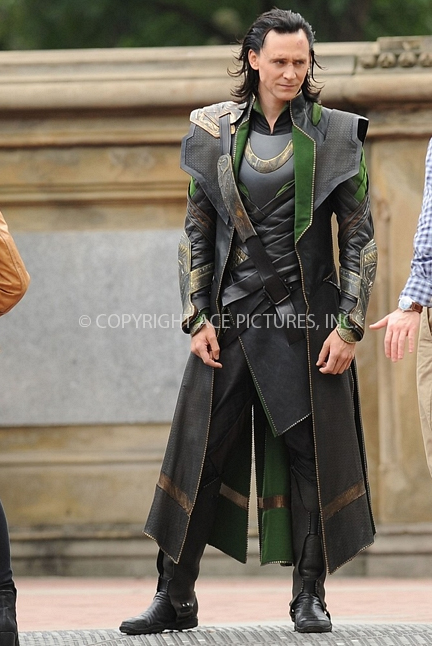
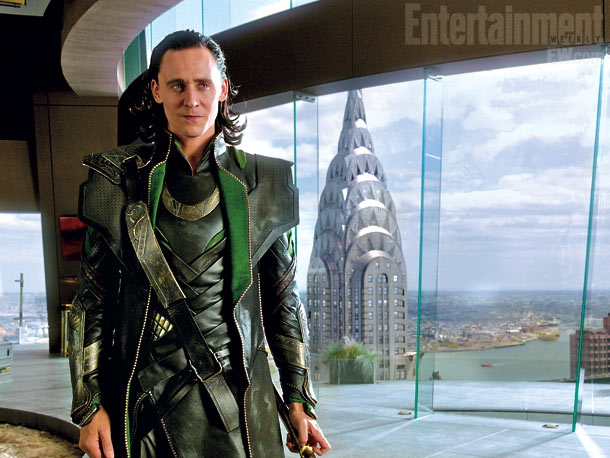
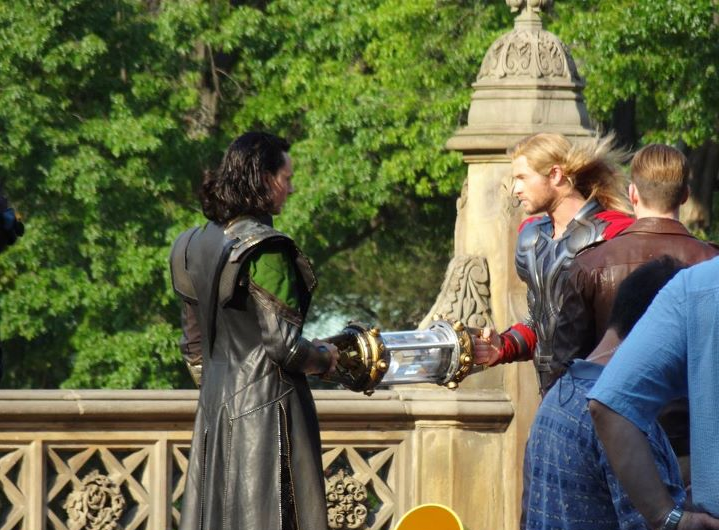
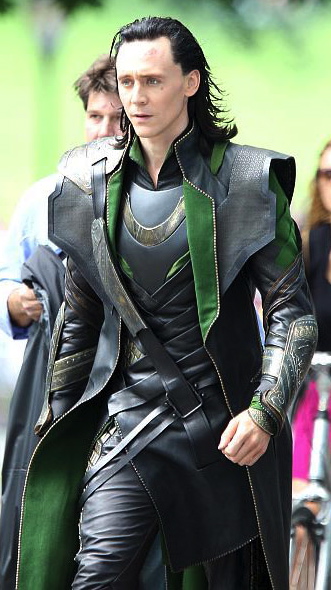
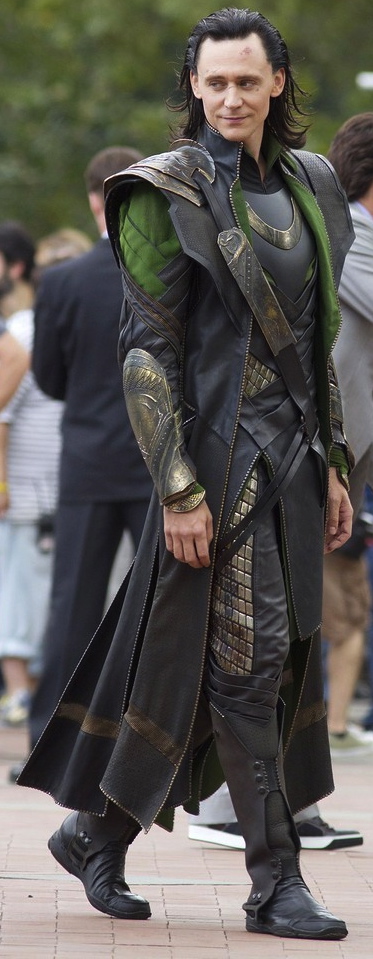
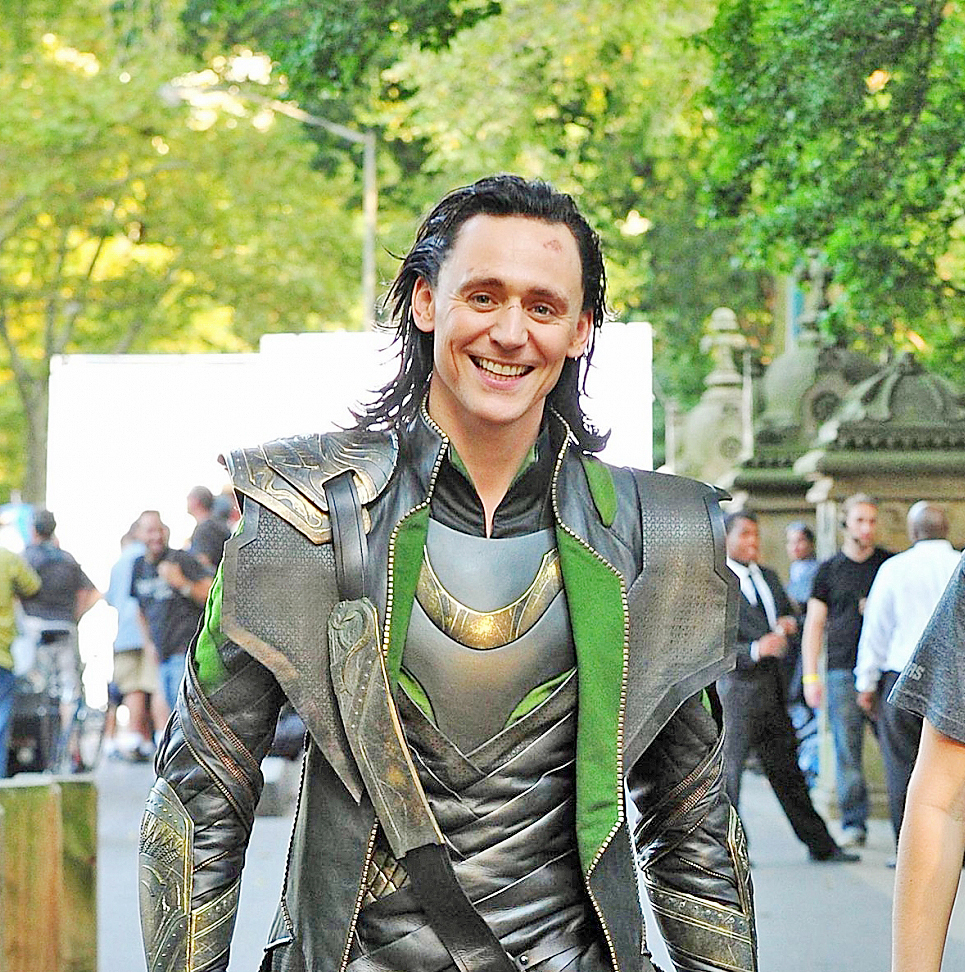
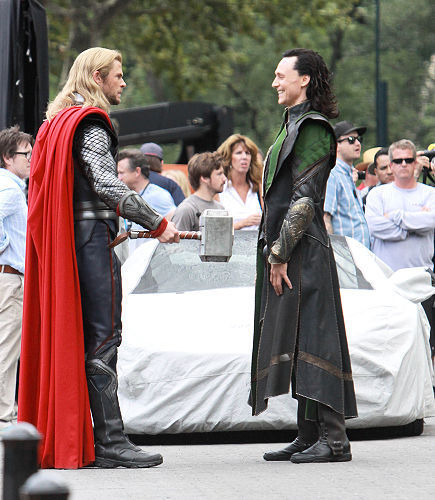
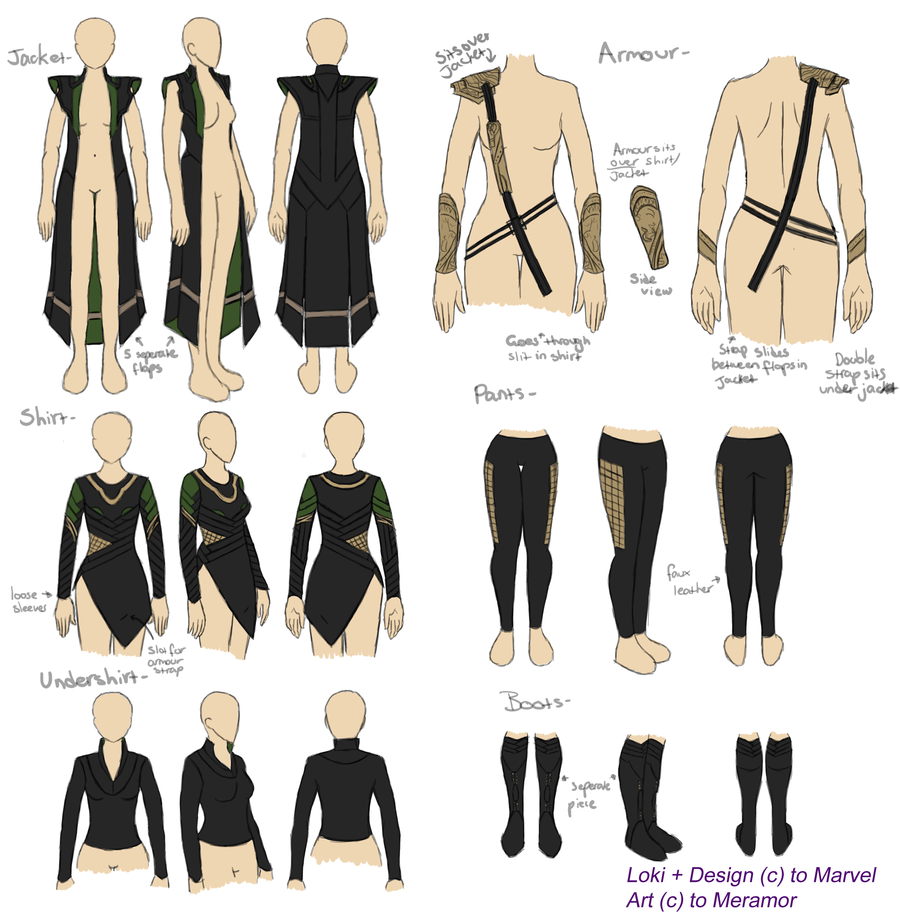
A fair chunk of the work put into this costume has been on gathering the correct materials for the job. Any one else looking to make a loki costume I’ve just made your work a lot easier, here’ s the list of where I sourced everything:

Wig (original seller has shut up shop, here’s a close match though)

http://www.ebay.co.uk/itm/Premium-Futura-Straight-Lace-front-Wig-Heat-Resistant-Available-In-13-Colors-/161011464287?pt=UK_Women_s_Wigs&var=&hash=item257d07f85f

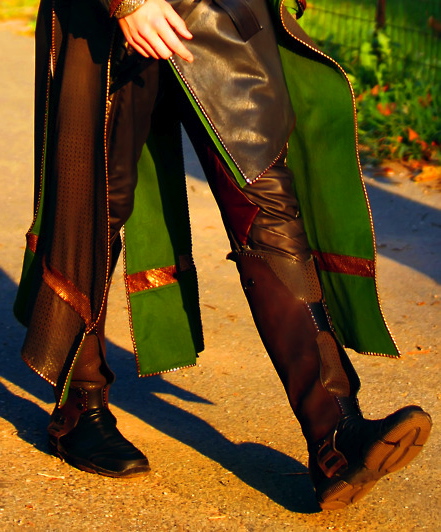
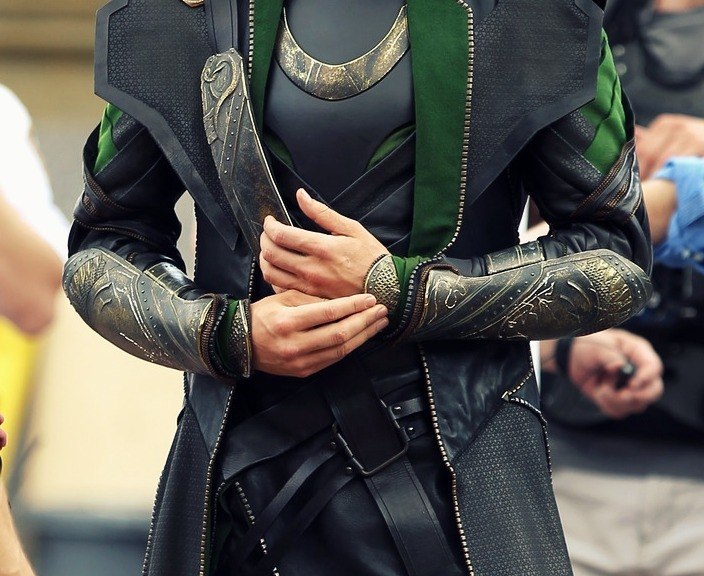
Black leather: http://www.leprevo.co.uk/ ( 017 cowhide brazillian leather)

Patterned leather: http://www.pittardsleather.co.uk/ (Big thanks to Liz for letting me know about this place. Call up and ask for a sample sent to you. They emboss lamb leather so you’ll need about 5 hides) My sample looked like this: 

Green fabric: I dyed noile silk in my washing machine with dylon dyes, all from fabric land. It looks like this http://www.fabricland.co.uk/NOILE.jpg

Metal edging: cheapest place I could find was on ebay here http://www.ebay.co.uk/itm/Zipper-stopers-Top-Stops-30-per-pack-/350410295147?pt=LH_DefaultDomain_0&var=&hash=item519614c76b Mine were size 10 in the brass. They come in packs of 30, I ordered 65 packs.

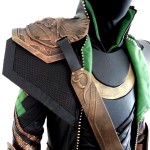
Metal chainmail fabric: Tricky one, on close inspection the costume looks like it’s got this stuff on it:

You can order samples and buy from this american company here: http://www.whitinganddavis.com/pages/cfMeshFabrics.cfm

Or you can buy 2 of these on ebay and repaint them like I did:

http://www.ebay.co.uk/itm/WOMENS-LADIES-CHAINMAIL-STUD-TIE-BACK-SEXY-PARTY-EVENING-CLUBWEAR-DRESS-TOP-6-12-/230811764430?pt=UK_Women_s_Tops_Shirts&var=530063751936&hash=item35bd7406ce

For armour I’m using silicone moulds and easy flo 120, which I buy here:

http://www.mouldlife.net/easyflo-120-1090-p.asp

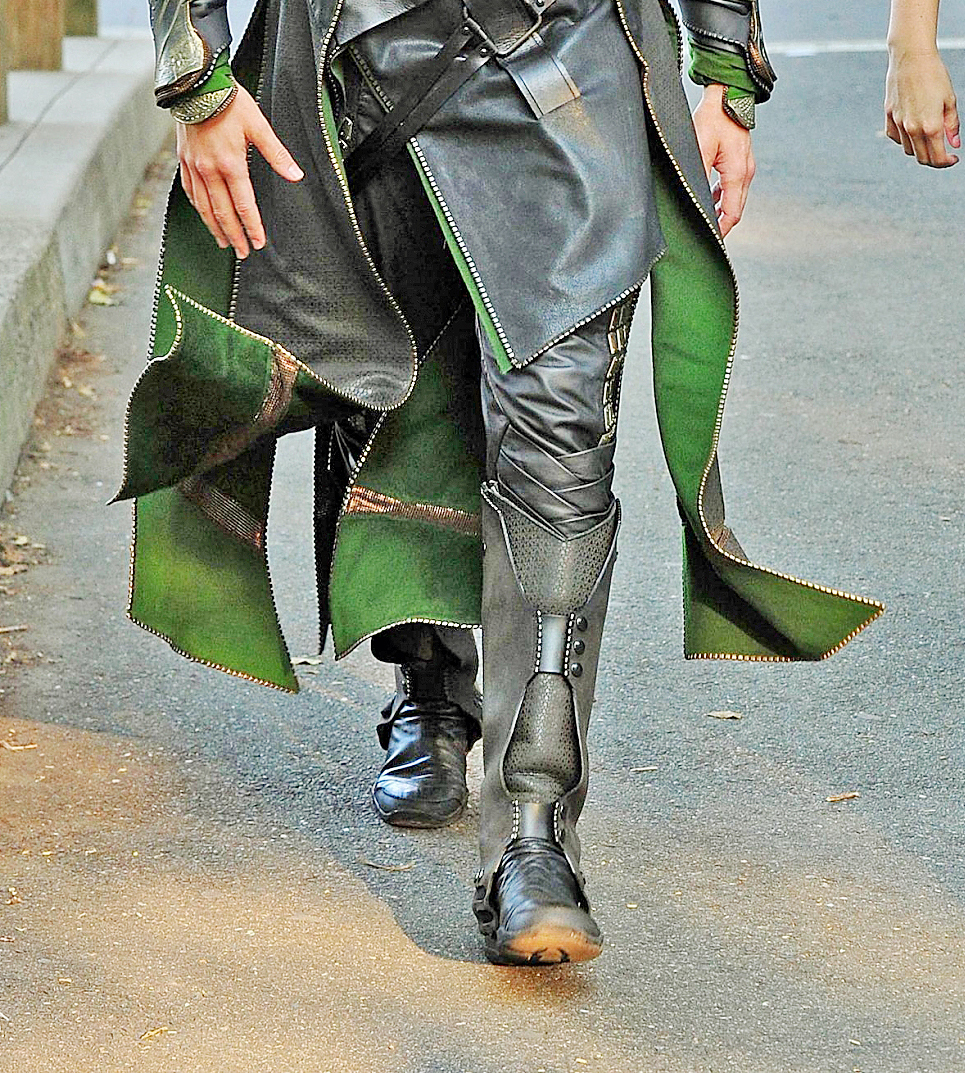
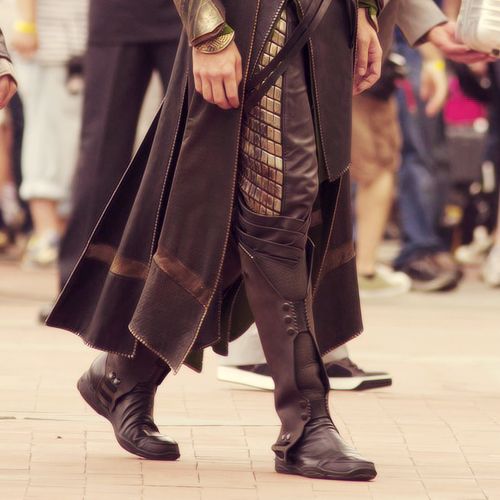
Black poppers for boot covers

http://www.ebay.co.uk/itm/181063569040?var=480211904904&ssPageName=STRK:MEWNX:IT&_trksid=p3984.m1439.l2649

Boots: http://cgi.ebay.co.uk/ws/eBayISAPI.dll?ViewItem&item=140832642298&var=440075012505

(bit pricey but they have the perfect toes. Had to be cut down at the front to avoid the trousers bulging)


And that’s about it! If there’s any bits I’ve missed please let me know and I’ll try to track down how I sourced it.

Minamicon 19- The Greatest Skit in the world!


More minami shenanigans! Christian and I practised for weeks to create the beauty you see in this video.


This was also the debut of my Gilderoy Lockhart costume to match Christian’s Snape. I bought the suit from an ex-hire ebay store and the shirt and shoes I already had.

The teacher robes were made with 4m of tan crepe, lined with some fabric I bought a few years back. The cravat is just a tube of matching fabric. The waistcoat is also made by me, I’ve got some photos to put up a tutorial later! The wand was sculpted from plastic, balsa wood and milliput, a silicone mould was taken and the final cast in easy flo 120 resin.


Super comfortable costume, though if Snape wasn’t next to me people just thought I’d decided to come as Emperor Tab, the fancy pants.

How to make a Plugsuit Side tutorial- Skin tight gloves

I hate gloves. Every costume maker does, they’re fiddily and a bad fitting glove will show up far more than a bad fitting jacket will.

Here’s how I make lycra gloves, with a helping hand from my friend- freezer paper!


Read the rest of this page »

How to make a plug suit Part 2- Armour/Plugs


All the fiddly plug parts done! Every bit is made from plastazote foam, in white so I can draw on it. All the complex parts were patterned in paper/card first with a lot of trial and error before being cut in foam and stuck together. These will all be covered in foam in various ways and sewn into the costume. Working with the plugs first and building the suit around them will make it much sturdier. I don’t want plugs to pop off, so I’m going to try to make it impossible for them to leave!

Of course the most important bit is this:


This is a list of every armour bit I had to make, with notes added as I go. This gives  you an idea of what you have left and helps you keep track of what needs doing. Saves you a lot of time in the long run, trust me!

How to make a Plug Suit Part 1- Mock Up

Yet more boring stuff that no one cares about reading- the meticulous pre-planning behind a costume.

I’m currently making a plug suit for a client, which looks like this:

She lent me the model for reference which is wonderful, nothing better than a mini 3D version of what you want to make.

The client provided me with a duct tape dummy which is vital to making a costume like this. They made it using this guide. Using the dummy I drafted up a pattern in some scrap lycra I had knocking about. It’s a raglan sleeve to reduce restriction on the shoulder and uses a swimsuit line on the legs for the same reason.


It hangs on the back of my workroom door so I can scare myself when I forget it’s not there.

The commissioner lives locally to me so I invited her over to test the fit and draw on all the patterns and seams with a chalk marker.


Any parts that were too large were taken in on the spot with a stapler. I now have something I know fits, and it’s time to start work on the final project!

How to make a Loki Costume Part 2- Mock up a pattern

Leather is expensive. Before you make anything it’s always a good idea to make up a rough version first and only cut into the expensive fabric when you’re completely happy with it. My commissioner lives in another country so we couldn’t arrange a fitting in person. Instead I send this to them, they try it on and give me feedback on the fit.

Here’s some pictures of it on my mannequin. My commissioner is a guy with a flatter chest than this, but it gives you an idea of what it looks like.

It’s made with white curtain lining which has a similar texture to leather. White also means that when it’s sent back to me it’s easy to draw all the lines of the interlocking pieces (like on the arms) and give them detailed labels. More labels= less confusing when you start sewing. All the seams are on the outside to make it easier to adjust if need be.

I’ve split the costume into 3 parts- trousers, tunic and coat. It’s technically a separate shirt and tunic, but to make it easier to get into I’m making them as one item with a zip up the back. The seam will be hidden by the coat and the hair and it helps keep the number of layers down. This looks like it will be a bit of a sweltering costume, so anything I can do to cool it down the better.

Next step is material tests and information on where I sourced all the supplies for this.

How to make a Loki Costume Part 1- References

So, big project time. I was approached by a commissioner to do this costume and I just couldn’t resist. They wanted to see progress images and we agreed that it would be a nice idea to blog the progress so other people could see how the costume is made if they’re making their own.

The most important part of making a costume replica is having as many pictures as possible. The commissioner was really good at this one, though I did have to do a bit of research myself. Below is my reference folder for this costume, sourced from all over the internet.

I also found this image of a costume study By Meramor on deviant art. I’ve included the original and a slightly lightened version so you can see the lines in the back of the coat. It’s very accurate, the only thing I would say is different is that the left handed lapel needs to be smaller.

Now you know what the thing looks like- next step is patterning!

Site Edits

Looks like we had some site issues which means my costume gallery went down! It’s all back up now, feel free to use it to stare at my face.

In other news, I got a picture of myself not in costume!


Got this taken at Jcon, a big thanks to Rei Bennett

Sima Yi Costume Post!

Source: Dynasty Warriors 7

Worn to:  Amecon 2012

Awards: Amecon 2nd Place

I like sewing, so I made a costume with lots of sewing in it :P This was made to be worn for the Amecon Omake. I don’t even play Dynasty Warriors, it was just pretty.

Click my face to read how I made it!

Amecon Shenanigans

I got up on stage and acted a tit. Here’s video evidence.

Big thank you to Karen for performing beautifully with me, Christian for helping me peg bits of blue costume on my washing line as it dried, Kii for letting me borrow her embroidery machine for the trim on the costume and Timber for manning my stall while I was off swanning about the convention.

Also a big thank you to the judges who decided I deserved a second place compared to all the other amazing costumes. Sima Yi was made over a period of 9 days with about 100 hours work, I didn’t even think I’d get it finished for the omake! Details on costume construction to follow when I get some pictures of it. Most of it is spray paint and acrylic ink, though it uses a lot of techniques that other people will probably appreciate for future costumes.