


Longest tutorial ever- The full construction of a heavily embroidered and beaded georgian waistcoat, 68 pictures of glory.
While Christian made his shirt for Blackadder, I started work on a vital, but also easiest parts of the costume, the trousers.
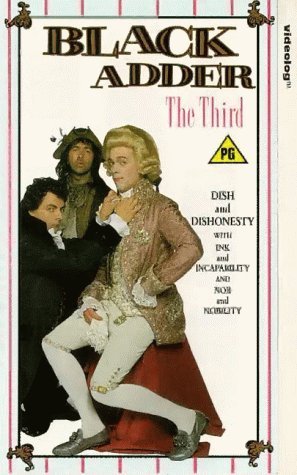
I bought 2m of cream taffeta which is rather see through, so I knew I’d have to self line these.
I’ve never made flap fronted trousers so I pretty much followed the instructions to the T. I drew the pattern out on the fabric with a blue chalk, then measured the size I needed for where the embroidery would go.
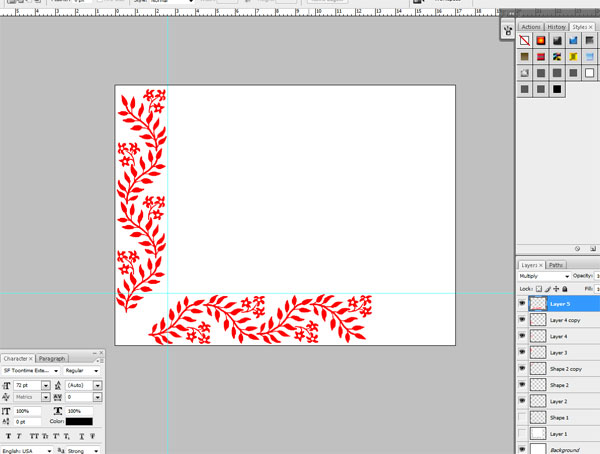
I have a template in photoshop for the embroidery hoop size, the challenge is making something that tessellates nicely and will fit in the border and also be able to be used in the corners of the work.
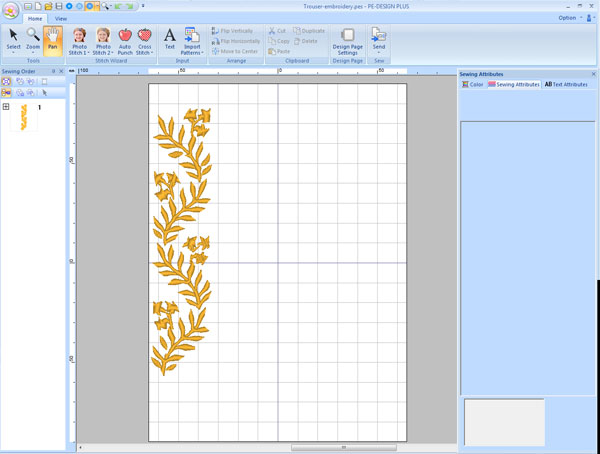
Here’s the pattern in PE design. I actually bought my machine because it came with this software for free, embroidery software can cost up to £1000. PE design is a bit of an idiot to work with, if I had a choice I would use http://www.embird.net/ instead.
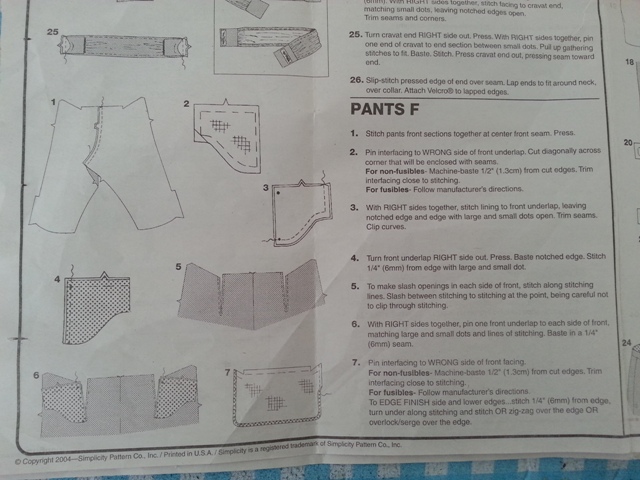
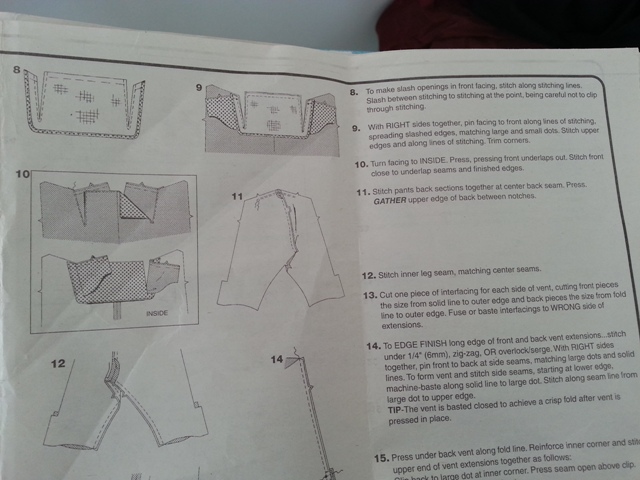
The pattern instructions here are surprisingly very good! I took the embroidered parts of fabric and completed steps 1, 12 and 14 to create a pair of trousers so I could fully line them before proceeding with the front flap steps. Lining trousers is a real head fuck, but I got there in the end!
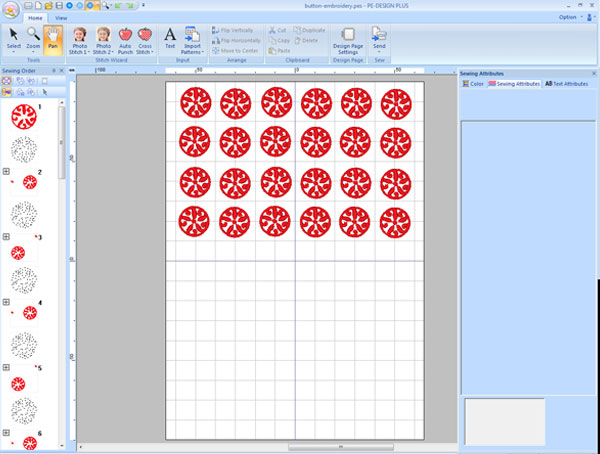
I made up a pattern for some buttons. The reference images for this costume are way too blurry to make out so I’ve got a folder of embroidery inspiration that I’ve been using for ideas.
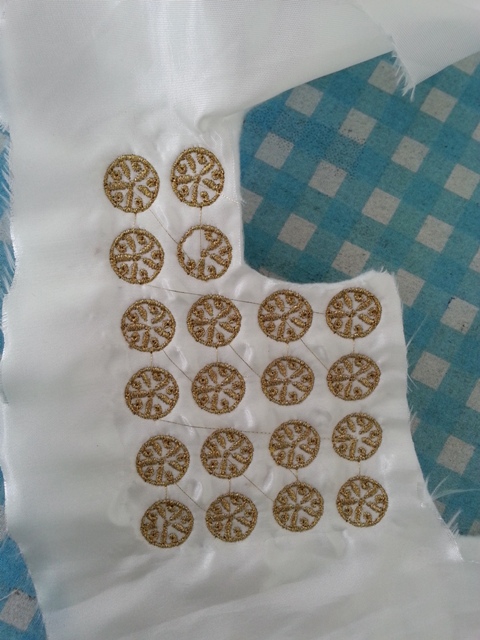
Here you can see the fail rate on machine embroidery and why large projects are terrifying to put in a machine.
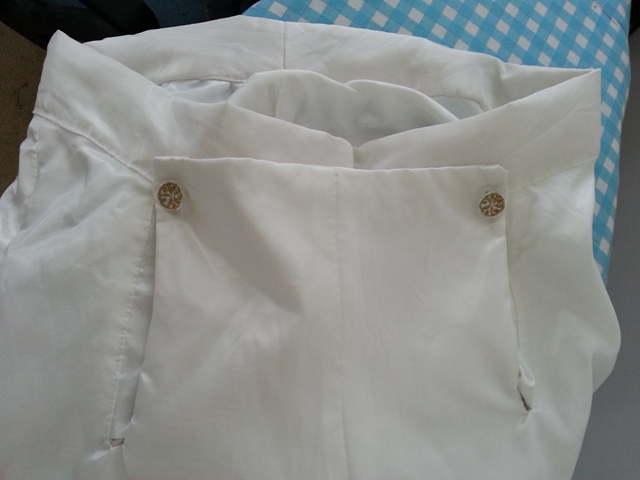
Sexy buttons.
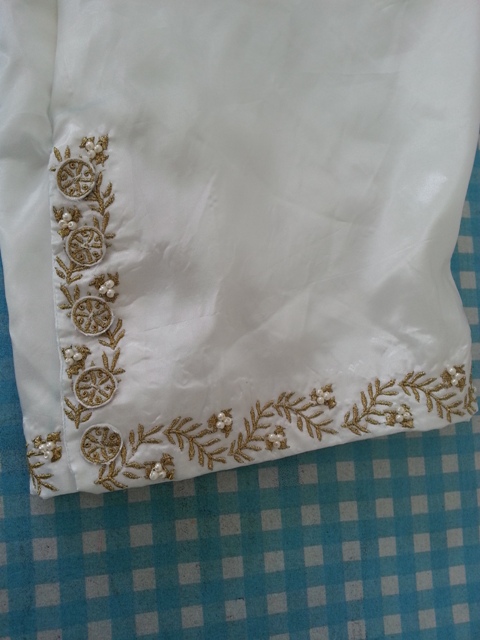
The first little clusters of pearls!
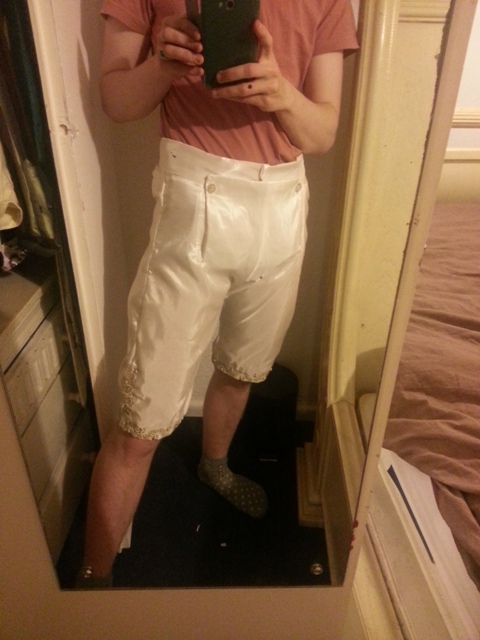
TADA!
I did the stupid thing of not trying something on until I was completely finished and the trousers were WAY too big. But in the bad way where they wrinkle at the crotch and look a bit like strange genitals. I took about 4 inches out on the sides, crotch and back seam, and the result is what you see here.
They’re still slightly see through even though they’ve been lined. I’m going to have to buy a pair of beige pants.
9 hours work, 2 bobbins worth of embroidery thread.
Total hours: 19
Once every year I save a commission slot for a personal costume. This is because I love getting up and doing skits with friends- that’s where my cosplay career started and where I hope to stay for many years to come. But just because something is a skit costume doesn’t mean I want it to be simple- this is my chance to try out new techniques and really push myself to do things I wouldn’t dare with commission work.
Enter Prince George:
Sweet jesus look at all that bling. LOOK AT IT. THE HOURS OF EMBROIDERY AND PEARLS AND BEAUTIFUL EVERYWHERE.
And the best thing about this costume? That my long term buddy Christian R Allan is the perfect compliment to the look.
(The one on the left…)
There are THREE things a costume must be before I consider it for a personal costume:
1) It must be a new challenge. (I’ve made so much armour that all I want to do now is sew. SEW I TELL YOU)
2) It must cost less than £200 in materials to make (Because anything more and my costume business is a farce)
3) I must have the ability to have FUN in it. (I.E. Can I sit down/move about/ spend the day not having to pull a bitch face)
We have a winner!
I’m going to go spent hundreds of hours beading a coat, then get smashed with Christian and possibly wreck it. Tally Ho!
Materials and research info under the cut!
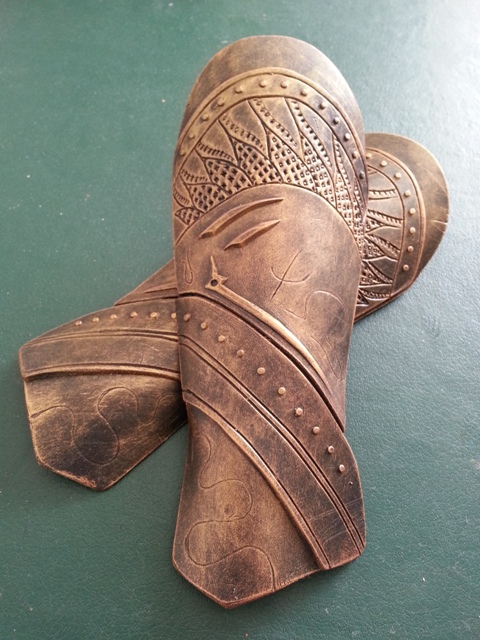
Yet another foray into the realm of beautiful things! Detailed breakdown of construction including templates under cut! (more…)
Making a big costume is a BIG load of work. I don’t know about other people, but if I look at a costume and start thinking about how much work I have to do I start panicking. This means instead of doing work I’m panicking about how much work I have to do, which is helpful to no one.
The loki armour was a BIG thing. I’ve had real fights with sculpting and resin in the past, so if I let myself contemplate the mammoth that was sculpting and casting each piece I knew I was doomed.
So I learnt to trick myself.
I broke it down as much as possible. I started sculpting the easiest parts first, slowing working my way up to more difficult pieces. It was a process summed up a bit like this:
Here’s the next step in the armour making process- Straps!
I have a secret about sculpting.
…I hate clay.
I mean REALLY hate it.
I hate it so much that I avoid it as much as possible. It seems that clay and I will never get along, so much so that I avoid costumes that I know I’ll have to do any sculpting in clay for.
I have lived in envy of other people who find sculpting in clay *fun* and produce these beautiful finger print free pieces. I am not one of those people.
So here’s how I made the sculpts for the loki armour with the LEAST amount of clay work possible.
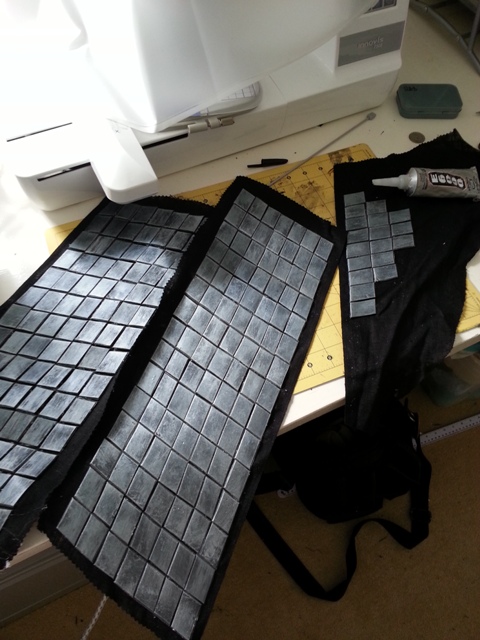
Pretty no? Here’s the breakdown of how the scales came to exist:
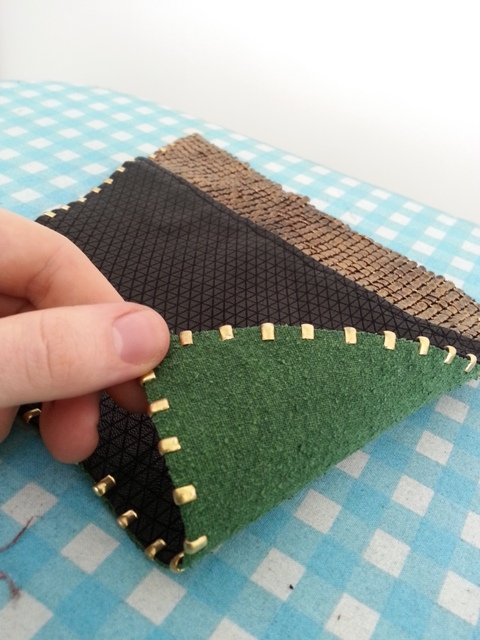
So, this is how you make something beautiful like this. During this project I would sew/add zip tops until my hands hurt too much then go off and sculpt armour until my hands hurt too much in a different way, then swap back. This is a costume to be paced- it’s physically impossible to last minute this!
I’m working hard on my loki commission and noticed that one of the hems was especially weird. Luckily for me the internet has a solution to everything, and here’s a fantastic tutorial you should look at, especially if you’re making a vest!
Also found a great PDF if you want ideas for how to finish off the bottom of skirts that isn’t just roll hemming:
So, I made a plug suit. A plug suit which has shoes that look like this:
Joy.
I decided I wanted to sew all the seams, which did look awesome and I don’t regret doing, but I sure as hell hated myself while I was doing it.
Image heavy tutorial under the cut!
A fair chunk of the work put into this costume has been on gathering the correct materials for the job. Any one else looking to make a loki costume I’ve just made your work a lot easier, here’ s the list of where I sourced everything:
Wig (original seller has shut up shop, here’s a close match though)
Black leather: http://www.leprevo.co.uk/ ( 017 cowhide brazillian leather)
Patterned leather: http://www.pittardsleather.co.uk/ (Big thanks to Liz for letting me know about this place. Call up and ask for a sample sent to you. They emboss lamb leather so you’ll need about 5 hides) My sample looked like this: 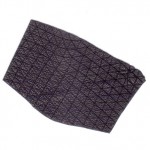
Green fabric: I dyed noile silk in my washing machine with dylon dyes, all from fabric land. It looks like this http://www.fabricland.co.uk/NOILE.jpg
Metal edging: cheapest place I could find was on ebay here http://www.ebay.co.uk/itm/Zipper-stopers-Top-Stops-30-per-pack-/350410295147?pt=LH_DefaultDomain_0&var=&hash=item519614c76b Mine were size 10 in the brass. They come in packs of 30, I ordered 65 packs.
Metal chainmail fabric: Tricky one, on close inspection the costume looks like it’s got this stuff on it:
You can order samples and buy from this american company here: http://www.whitinganddavis.com/pages/cfMeshFabrics.cfm
Or you can buy 2 of these on ebay and repaint them like I did:
For armour I’m using silicone moulds and easy flo 120, which I buy here:
http://www.mouldlife.net/easyflo-120-1090-p.asp
Black poppers for boot covers
Boots: http://cgi.ebay.co.uk/ws/eBayISAPI.dll?ViewItem&item=140832642298&var=440075012505
(bit pricey but they have the perfect toes. Had to be cut down at the front to avoid the trousers bulging)
And that’s about it! If there’s any bits I’ve missed please let me know and I’ll try to track down how I sourced it.
I hate gloves. Every costume maker does, they’re fiddily and a bad fitting glove will show up far more than a bad fitting jacket will.
Here’s how I make lycra gloves, with a helping hand from my friend- freezer paper!
All the fiddly plug parts done! Every bit is made from plastazote foam, in white so I can draw on it. All the complex parts were patterned in paper/card first with a lot of trial and error before being cut in foam and stuck together. These will all be covered in foam in various ways and sewn into the costume. Working with the plugs first and building the suit around them will make it much sturdier. I don’t want plugs to pop off, so I’m going to try to make it impossible for them to leave!
Of course the most important bit is this:
This is a list of every armour bit I had to make, with notes added as I go. This gives you an idea of what you have left and helps you keep track of what needs doing. Saves you a lot of time in the long run, trust me!
Yet more boring stuff that no one cares about reading- the meticulous pre-planning behind a costume.
I’m currently making a plug suit for a client, which looks like this:
She lent me the model for reference which is wonderful, nothing better than a mini 3D version of what you want to make.
The client provided me with a duct tape dummy which is vital to making a costume like this. They made it using this guide. Using the dummy I drafted up a pattern in some scrap lycra I had knocking about. It’s a raglan sleeve to reduce restriction on the shoulder and uses a swimsuit line on the legs for the same reason.
It hangs on the back of my workroom door so I can scare myself when I forget it’s not there.
The commissioner lives locally to me so I invited her over to test the fit and draw on all the patterns and seams with a chalk marker.
Any parts that were too large were taken in on the spot with a stapler. I now have something I know fits, and it’s time to start work on the final project!
Leather is expensive. Before you make anything it’s always a good idea to make up a rough version first and only cut into the expensive fabric when you’re completely happy with it. My commissioner lives in another country so we couldn’t arrange a fitting in person. Instead I send this to them, they try it on and give me feedback on the fit.
Here’s some pictures of it on my mannequin. My commissioner is a guy with a flatter chest than this, but it gives you an idea of what it looks like.
It’s made with white curtain lining which has a similar texture to leather. White also means that when it’s sent back to me it’s easy to draw all the lines of the interlocking pieces (like on the arms) and give them detailed labels. More labels= less confusing when you start sewing. All the seams are on the outside to make it easier to adjust if need be.
I’ve split the costume into 3 parts- trousers, tunic and coat. It’s technically a separate shirt and tunic, but to make it easier to get into I’m making them as one item with a zip up the back. The seam will be hidden by the coat and the hair and it helps keep the number of layers down. This looks like it will be a bit of a sweltering costume, so anything I can do to cool it down the better.
Next step is material tests and information on where I sourced all the supplies for this.
So, big project time. I was approached by a commissioner to do this costume and I just couldn’t resist. They wanted to see progress images and we agreed that it would be a nice idea to blog the progress so other people could see how the costume is made if they’re making their own.
The most important part of making a costume replica is having as many pictures as possible. The commissioner was really good at this one, though I did have to do a bit of research myself. Below is my reference folder for this costume, sourced from all over the internet.
I also found this image of a costume study By Meramor on deviant art. I’ve included the original and a slightly lightened version so you can see the lines in the back of the coat. It’s very accurate, the only thing I would say is different is that the left handed lapel needs to be smaller.
Now you know what the thing looks like- next step is patterning!
Source: Dynasty Warriors 7
Worn to: Amecon 2012
I like sewing, so I made a costume with lots of sewing in it :P This was made to be worn for the Amecon Omake. I don’t even play Dynasty Warriors, it was just pretty.
Click my face to read how I made it!
I sometimes get asked for a tutorial on how I made my 1 week iron man costume, but like most things on the internet, someone’s already made a better one!
http://www.xrobots.co.uk/
Here’s some videos he’s made that I think are particularly good:
This technique would also be fantastic for anyone making halo armour. He uses PVA coating and various paints while I used PVC fabric stretched over foam, but I think his technique is much better for a beginner with armour, and has many advantages (like the way it treats curves and strength) that PVC doesn’t.
As a commissioner it’s always awkward knowing how much my work is worth. For all of you out there who also make commissions, Cathy Hay has once again published a wonderful article on the subject:
http://www.foundationsrevealed.com/free-articles/62-how-much-to-charge-by-cathy-hay
Just waiting on the photos and videos from minami, but until then I’ve come across a fantastic set of Corset tutorials that pretty much cover corsets from start to finish!
Drafting!
http://www.foundationsrevealed.com/free-articles/74-draft-your-own-corset
http://yourwardrobeunlockd.com/images/stories/pdf/draftyourowncorset.pdf
Inserting a busk!
http://mrseamstress.blogspot.co.uk/2009/04/corset-making-101-inserting-busk-1.html
http://mrseamstress.blogspot.co.uk/2009/04/corset-making-101-inserting-busk-2.html
(I like this method most as it reduces the stress on the seam of the corset and creates a little flap to prevent a gap at the front)
Sewing the damn thing together!
http://steamingenious.blogspot.co.uk/2012/02/corsetmaking-part-4-folded-seam-method.html
(This is the method I use the most, great to have a well written tutorial on it!)
Finishing it off!
http://yourwardrobeunlockd.com/freebies/356-perfect-binding-part-1-by-cathy-hay
http://yourwardrobeunlockd.com/freebies/356-perfect-binding-part-1-by-cathy-hay?start=1
Chiffon. It’s a light weight semi transparent fabric that if you’ve ever sewn, you’ll know the pain of 100 suns.
Here’s a fantastic tutorial by Eggie’s Red Dres which produces seams that look this good:
Click through to read more!
Phew, what a year! Just came back from the last convention of the season, now have a big break until the end of January for Akumacon in Ireland!
It’s been a busy year, more conventions than I ever thought possible have turned up. The next few months will be focusing back on commission work, a January of Taxes and refurbishing our shed to take more stock.
I’ve been behind with updating the site with tutorials, but I’ve been doing some really interesting commissions recently that has thrown up what I like to call a “disaster tutorial”. It’s rare that you get to see people make mistakes, so I’ll be taking you step by step through everything I did wrong, what I learned, and the final finished result when everything finally went right!
Riddle me this batman…