

Here’s the story of how I finally arrived at this wig- I think every project has a moment where everything goes wrong and you have to go cry in a corner for a little while. This wig was mine.

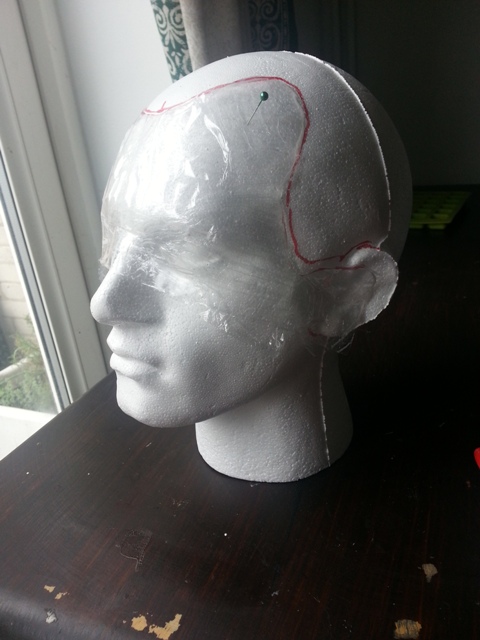
I bought a male wig head on ebay- I don’t have a particularly large head but wig heads tend to be tiny to make wigs look better. I would cut both male and female wigs on a male head for this reason. I got Christian to wrap the top of my head in cling film and sellotape then mark out where my hair line and ears sit. This I then transferred to the wig head to make sure my hair won’t show through.
I pin some scrap fosshape to the head and sew it with a over stitch.
Fossshape is basically a synthetic felt so you heat it with a heat gun and it will solidify to the shape. It has a habit of curling though so needs to be pinned at the edges.
This is me wearing the special special hat to check the fit.
I unbend a white paper clip and use it to reinforce the ears.
I sew a weft all around the under edge using a overhand stitch. I bought 3 sets of wefts from coscraft for this project. This is it put on the wig head.
I slowly add more wefts. At this point I start to get worried for the project- while the hair is good quality and thick it’s way too long to be manageable. The white colour also means the skin colour ends show through.
I start backcombing to create a beehive effect, leaving a section at the front to create the smooth top.
I pull the top back and take a look.
Sectioning off the sides for the curls
I use some big upholstery needles to form the beehive into shape and secure the hair with the help of much hairspray.
At this point I actually try the damn thing on and discover that it’s too heavy at the back and slips. Previously I would add wig clips to the front but I’ve just shaved all my hair off and have nothing to attach clips to.
I try removing as much as I can from the pony tail but it’s still to heavy. At this point I decide to start again with a different wig- I can deal with a heavy wig for another costume, but I want to be able to work on my table and have fun at Ayacon, so NEXT WIG.
With less than 2 weeks to the convention I order a lace front wig off an ebay UK seller. It costs £35 including shipping which is not bad considering. It arrives and is a bit thin in places, but the lace front will make the beehive look much better. The elastic on the back will also mean I can hold it on my buzzcut.
I section off the lace front and put the sides in curlers. Hairspray and heat reshapes the hair.
Poundland hair curlers to give the front a bit of shape and volume.
I backcomb the middle like before.
I use a combination of back combing and my hairdryer to lift the hair up.
Here’s the back combed wig pulled back into a pony tail with an elastic band. I decided to make the pony tail temporary so if the wig messes up during use it will be easy to be restyled.
There’s a gap between the beehive and the lace front so I run a line of hot glue down it and glue the fluff over the top.
I slowly work the layers back using a butt-tonne of hairspray.
The top and bottom are pulled into separate pony tails using bands.
Trickiest part of the wig- I use a pen and much twisting to make the curls at the side. When I take the clips away they don’t hold up very well so I get some beige bobby pins and slide in 2 per curl.
Add a ribbon at the back and DONE.
Front shot!
This wig is comfortable to wear and looks great- sometimes you just have to start again!
Leave a Reply