


This tutorial is about how to make a lot of bias binding if you need it.
Bias binding is useful for many things, mainly edging. You can make it out of practically any woven fabric as long as it’s not too thick. I make most of my own bias binding because I like to colour match, and also because the satin used for the regular reels of the stuff tend to be really shiny and horrible.
What is bias binding? Bias is the diagonal on a woven piece of fabric. But cutting on the bias you can take a non stretch fabric and make it stretchy enough to be sewn around corners.
You will need:
This method shows you how to make one 11 metre piece of bias binding out of a 150x 75cm piece of fabric. Why 150×75? There are a couple of reasons:
Right, lets get started!
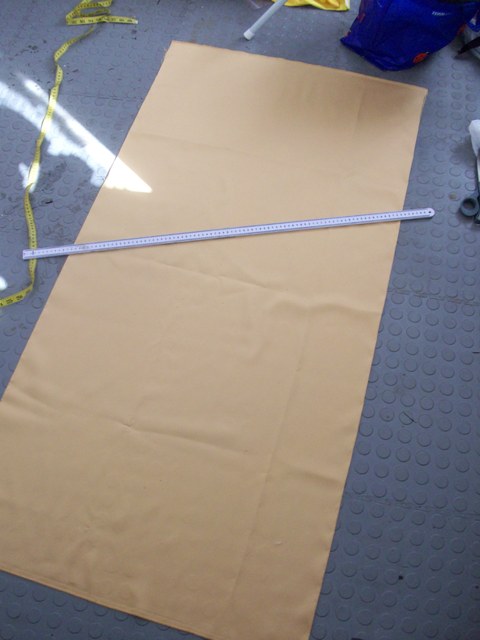
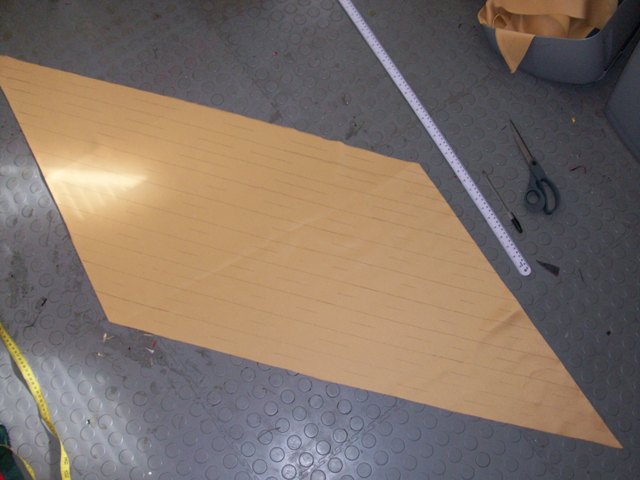
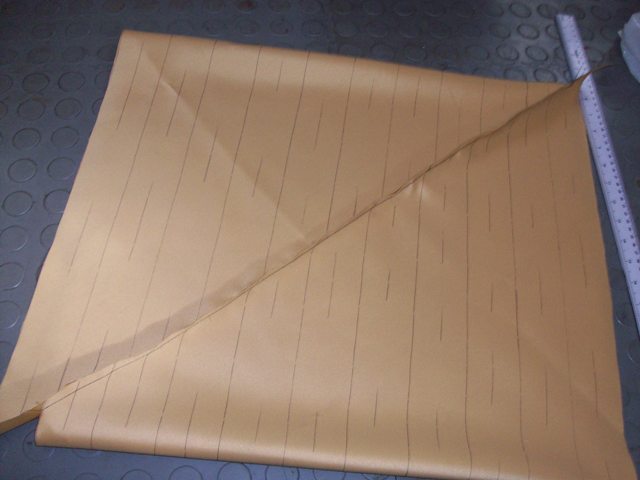
Here’s your fabric! Now you want to measure 75cm up the side and draw a right angled isosceles triangle in the corner.
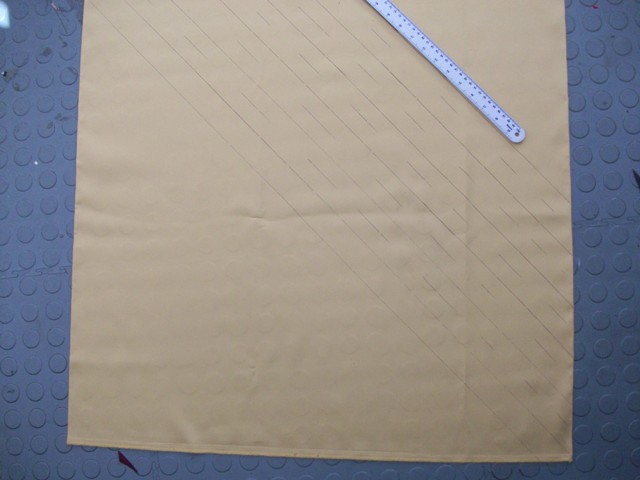
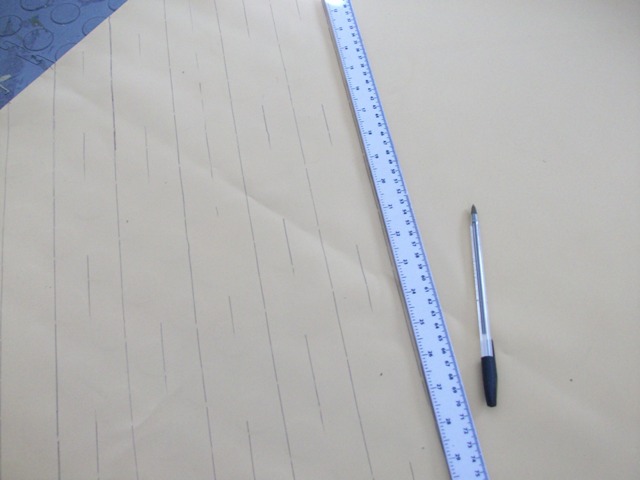
Start drawing lines 2 ruler widths apart. I draw one line dotted so it’s easier to tell which ones I’ll actually be cutting. This make a decent sized bias binding, any smaller and it would be useless. I use a biro pen because it gives clear lines and on this satin the biro doesn’t show through. For more delicate fabrics use chalk or pencil.

Fill the entire thing up until you get to the next corner.
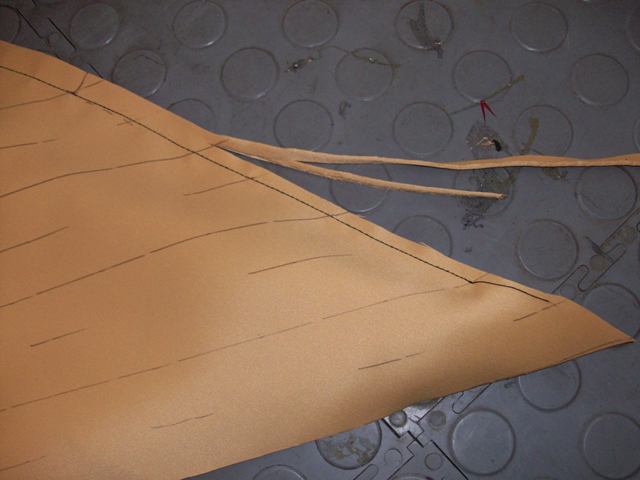
Cut the two triangles and the top and bottom off, leaving only the parallelogram behind.

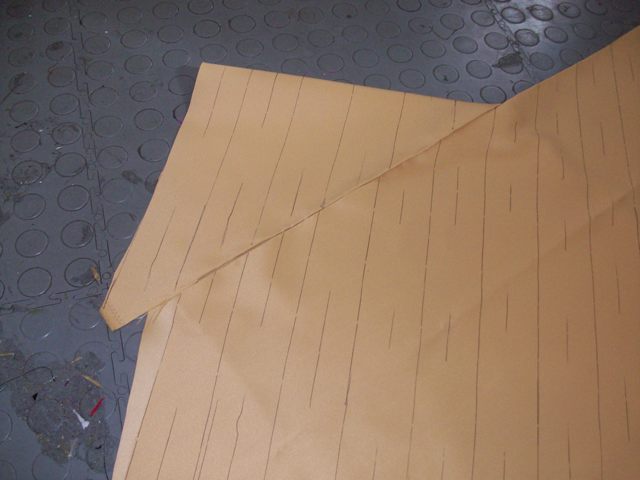
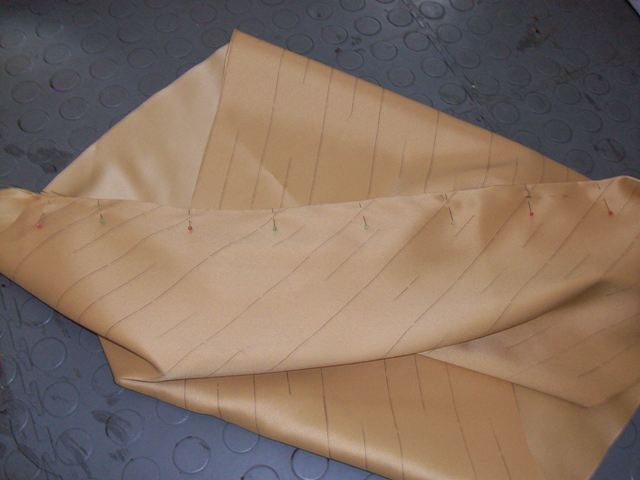
Fold it over and line the rows up, with one overlapping. It will create a giant spiral of bias for you to cut down.
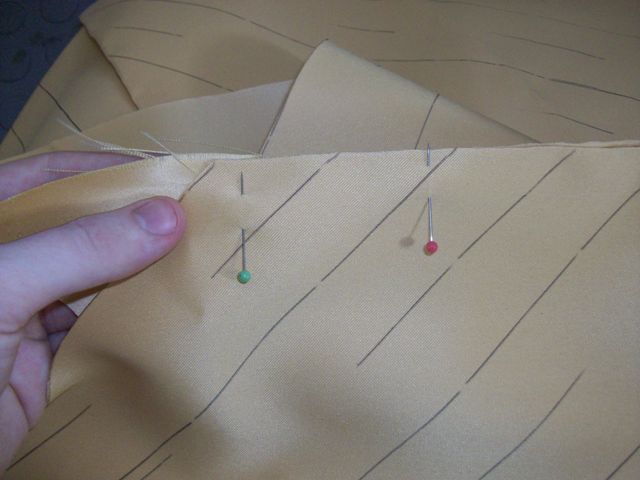
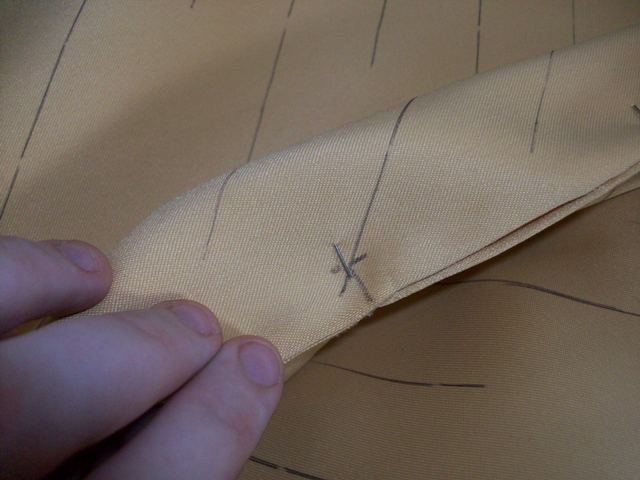
Line it up so that when you sew you account for seam allowance. The lines for where you cut should cross over around 1.5cm from the edge.
It will become this weird object that isn’t a tube but wants to be. Sew down the pinned edge!
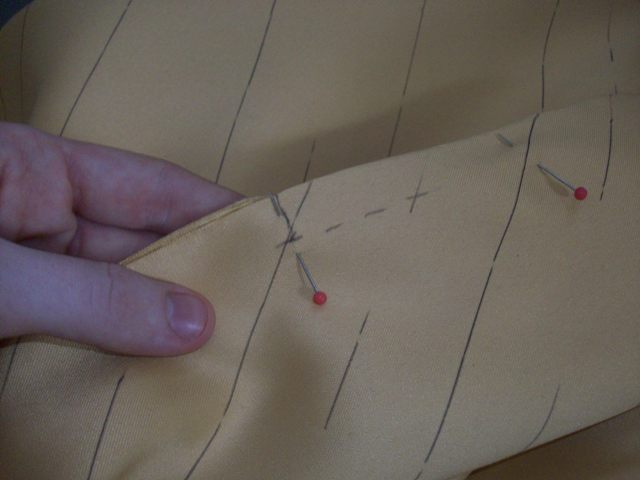
Trim the extra seam allowance off.
It will now make a tube which is actually a giant spiral of binding, ready for the cutting! You’ll want to iron the seam here as it’s easier than doing it later. Ironing the seam means that it’s less visible when bias is sewn into place.

Starting at one end begin cutting down the side, rotating as you go. If there are any sections which don’t line up perfectly at the seam just try to connect them as smoothly as possible. Don’t make big jumps.

You will have now made a lot of bias binding! This is 11mx 5cm.
Next tutorial will be how to attach binding in place!
Pingback: Bias Quilt Binding: Explore Three Ways to Do It! On Craftsy.